
Note: Some features and UI elements mentioned in this guide may not be functional yet.
1. Create Profile
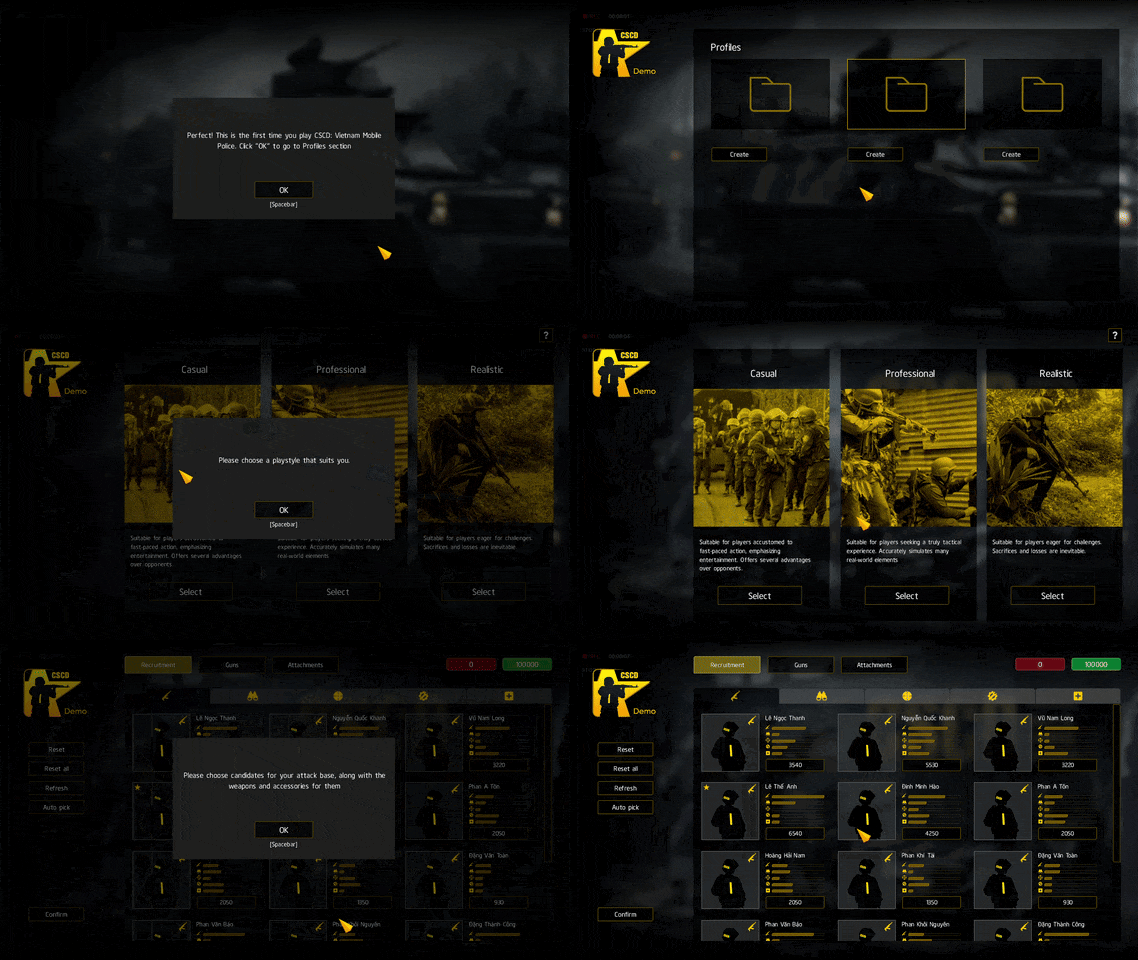
- The first time you start the game, after agreeing to the Terms of Service, you'll be asked to create a profile. This profile will save all the details of the team you'll be managing.
- Afterwards, simply choose your preferred playstyle.
2. Recruitment, Acquiring Weapons and Attachments
Recruitment
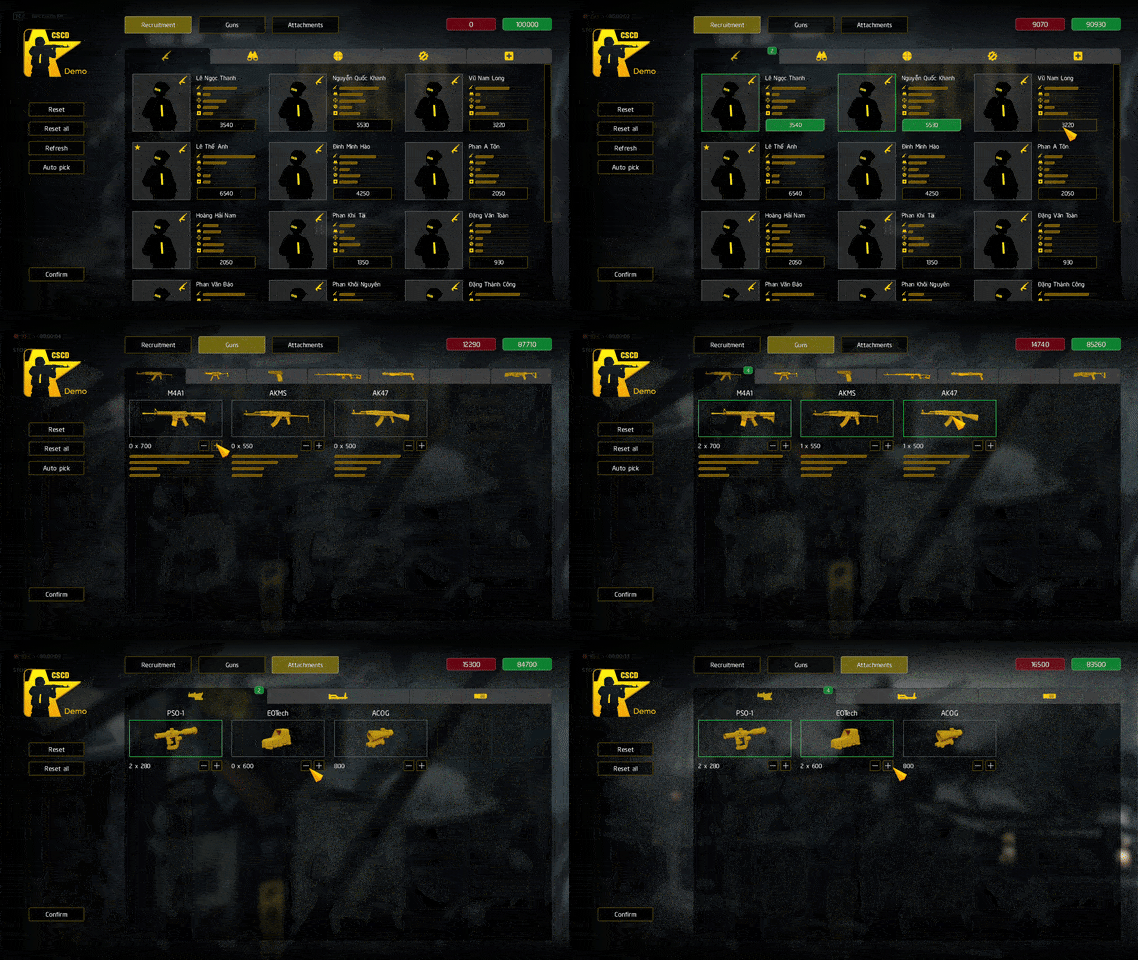
- Select operators by clicking their credit cost button. Click once more to deselect.
- Players can command up to 3 squads, each with a maximum of 5 operators.
- If the current candidate list isn't suitable, click Refresh for a new one.
- Important: At present, soldier skill ratings have no impact on gameplay.
Acquiring Weapons and Attachments
- You need to select enough weapons to fully equip your chosen operators. Each operator can carry 1 primary weapon (like an assault rifle, SMG, or sniper rifle) and 1 secondary weapon (sidearm).
- Similarly, ensure the selected attachments are sufficient for your chosen weapons. Each weapon can be equipped with multiple attachments.
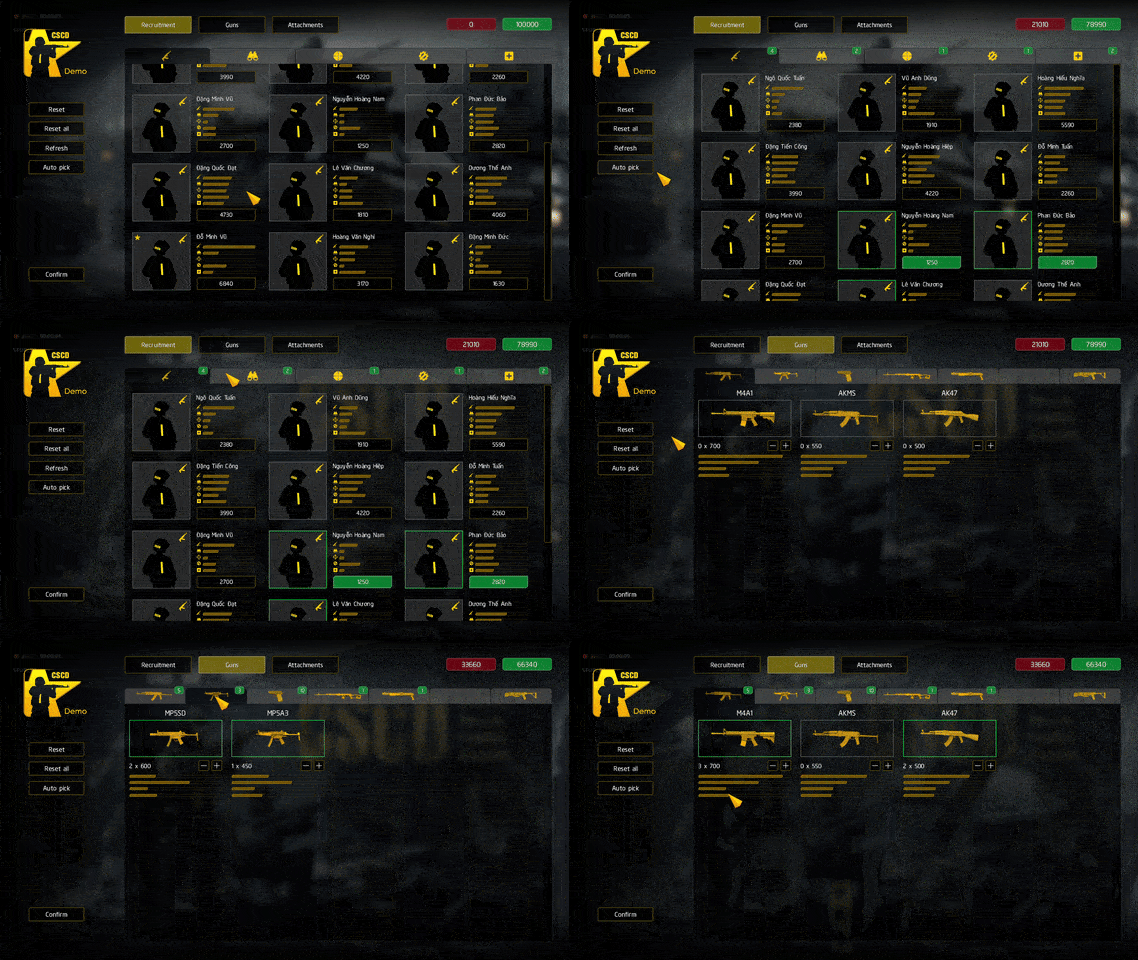
- You can use the Auto-pick feature to have the game make selections for you. This saves time, but it doesn't guarantee optimal results for your squad.
3. Finish
- Once you're happy with your choices, click Confirm and then Yes to finalize everything.
- The game will then take you to the main menu screen. Congratulations, you've successfully completed the initial profile setup for your first time in the game!
4. Pre-made Profile
- If you prefer not to create a profile, or if your profile creation fails, you can download a pre-made profile file provided by the development team below.
- This profile includes optimized choices for personnel, weaponry, and attachments, as well as the setup of operators within one attack squad. Just copy it to the Documents/cscdvmp/profiles directory, overwriting existing files if necessary.
- You may also rename the file to profile2.dat or profile3.dat. It will then be displayed in the respective slot in the in-game profile list.