
1. Overview
This article will guide you through bringing any gun model into GDE, covering the following steps:
- Prepare the CB Gun and CB Hand models in 3D software.
- Export to .fbx format and import into GDE.
- Configure the imported objects.
- Set up the weapon's parameters and prepare the sound files.
- Publish the data and package.
- Test it in-game.
There are 3 objects you need to prepare:
- Gun model: already rigged/skinned for the bolt.
- Magazine model: can be skipped if the gun doesn't use one.
- Hand model: already rigged/skinned.
The author assumes you already have experience using 3D software, specifically Blender, though you can absolutely apply this article's content to other 3D software (C4D, 3DMax, Maya, etc.).
Note
The gun model used in this article is the AKM. Feel free to pick a different gun model to practice with, though.
2. Preparing the gun model (CB Gun)
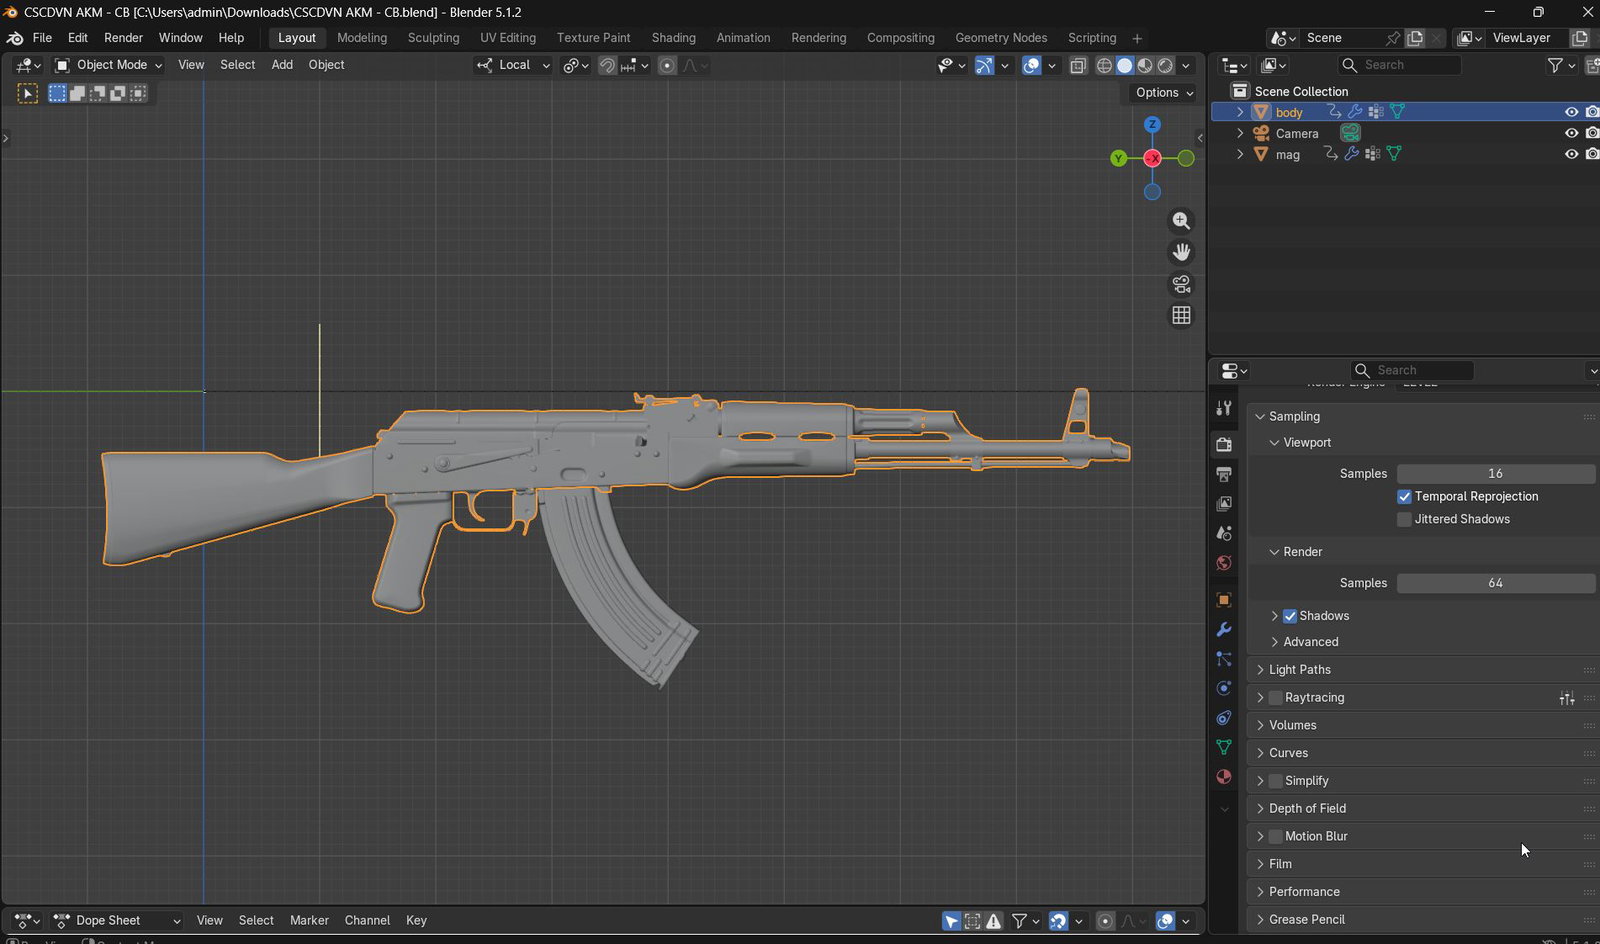
2.1 Polycount
The tri count for a CB-flow model depends on the complexity of the gun it represents. The recommendation is 70k or below; around 40k to 50k is reasonable for an illustrative model like the AKM at LOD0, which works fine for both FPS view and World view (combined with LOD1+). For pistols, 10k to 25k is fine.
2.2 "body" and "mag"
A gun model usually has many parts, and these parts need to be joined and renamed according to the standard.
Warning
Save a new .blend file before joining, so you don't affect the original file.
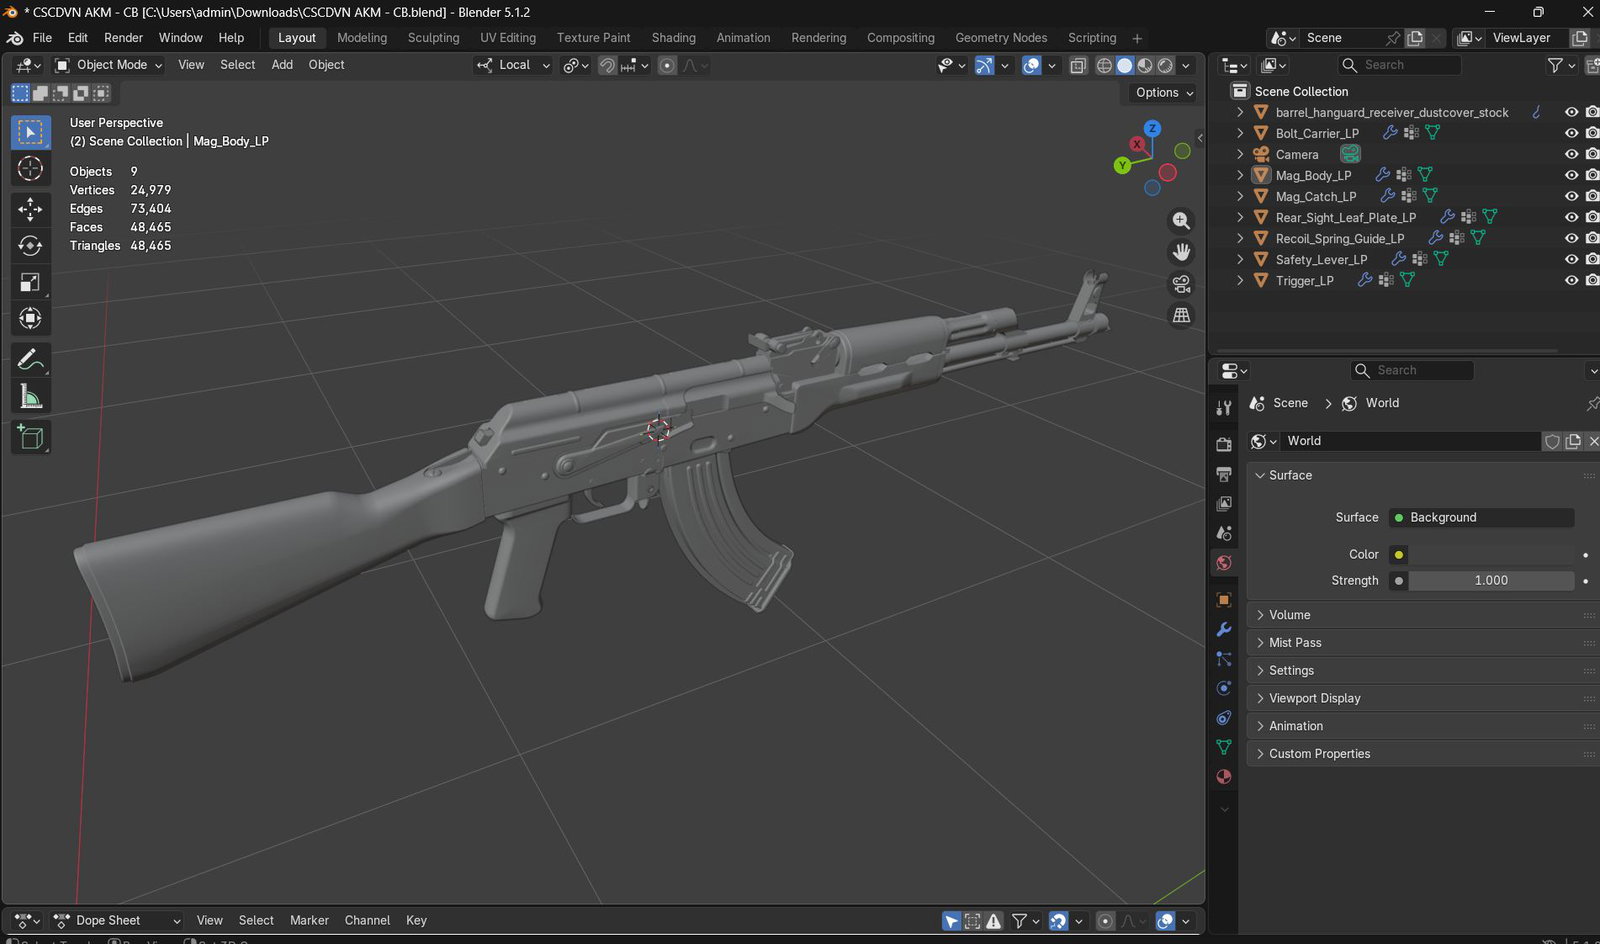
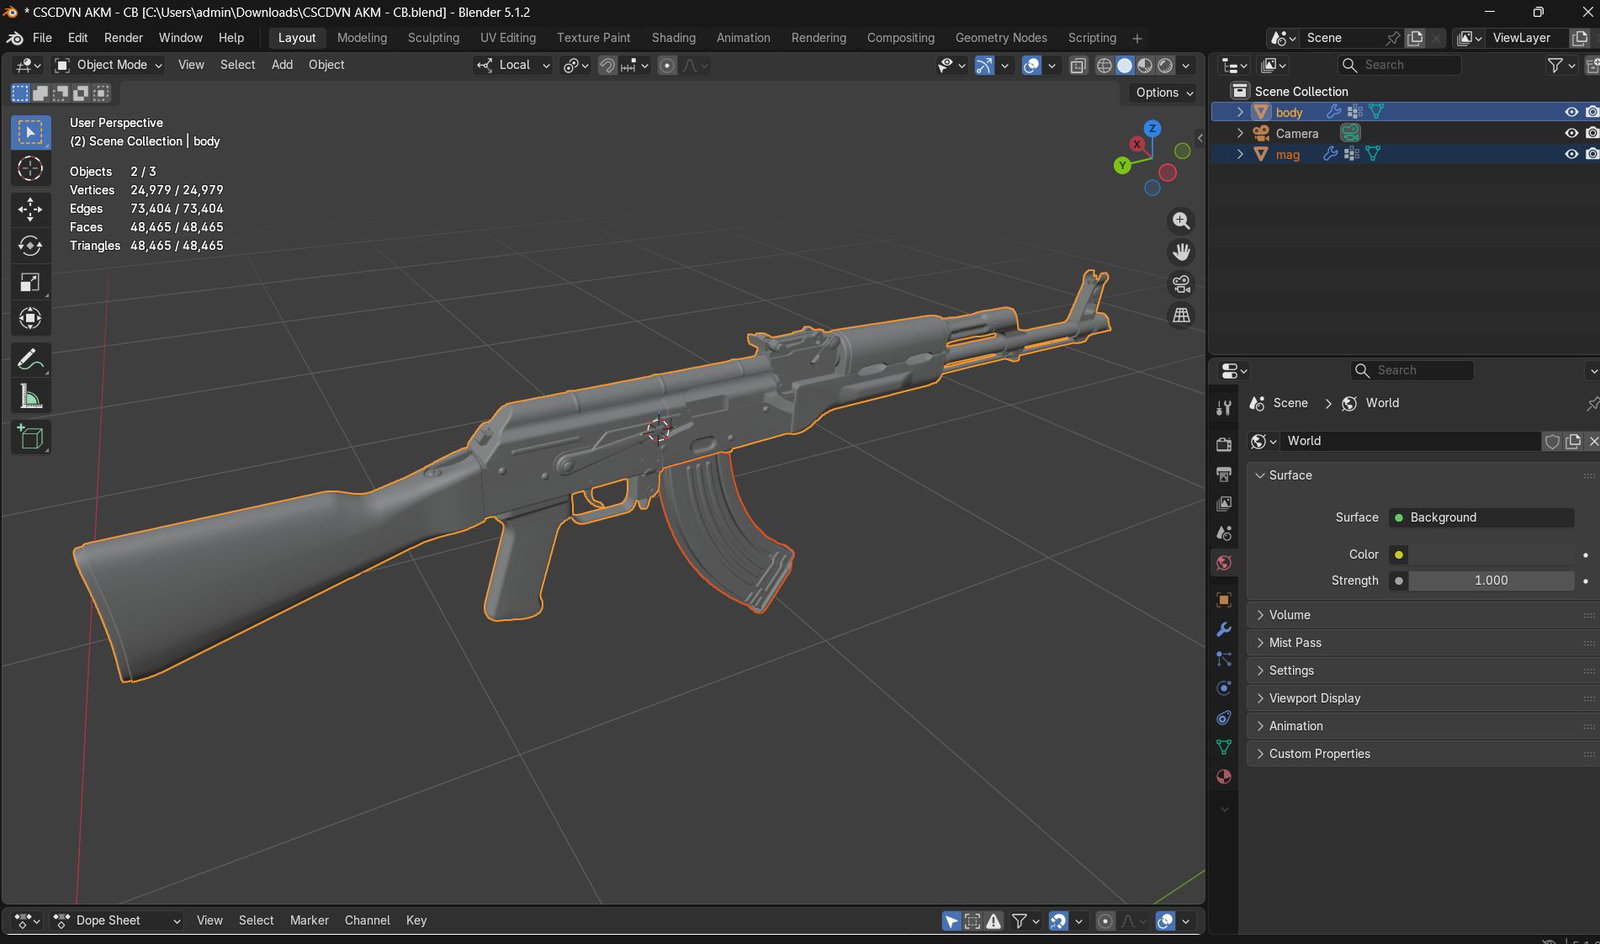
- Select all of the gun's meshes except the magazine mesh.
- Press Ctrl+J to join them, then rename the new mesh to "body" and the magazine mesh to "mag".
The illustration below shows the model's meshes before and after joining.
Tip
You can delete meshes that the player never sees (if any) before joining — this helps optimize the tri count.
Note
From this point on, whenever the article refers to "the whole model" or doesn't specify a particular object, it means the operation applies to both the "body" and "mag" meshes.
2.3 Orientation
When the model is exported to fbx and imported into the engine, the model's Y- axis in Blender becomes the engine's Z+ axis (also called the forward vector).
- Rotate the whole model so the barrel points toward the Y- axis.
- Apply rotation.
Note
In the illustrations above, the barrel's orientation was already correctly set along the Y- axis.
2.4 Scale
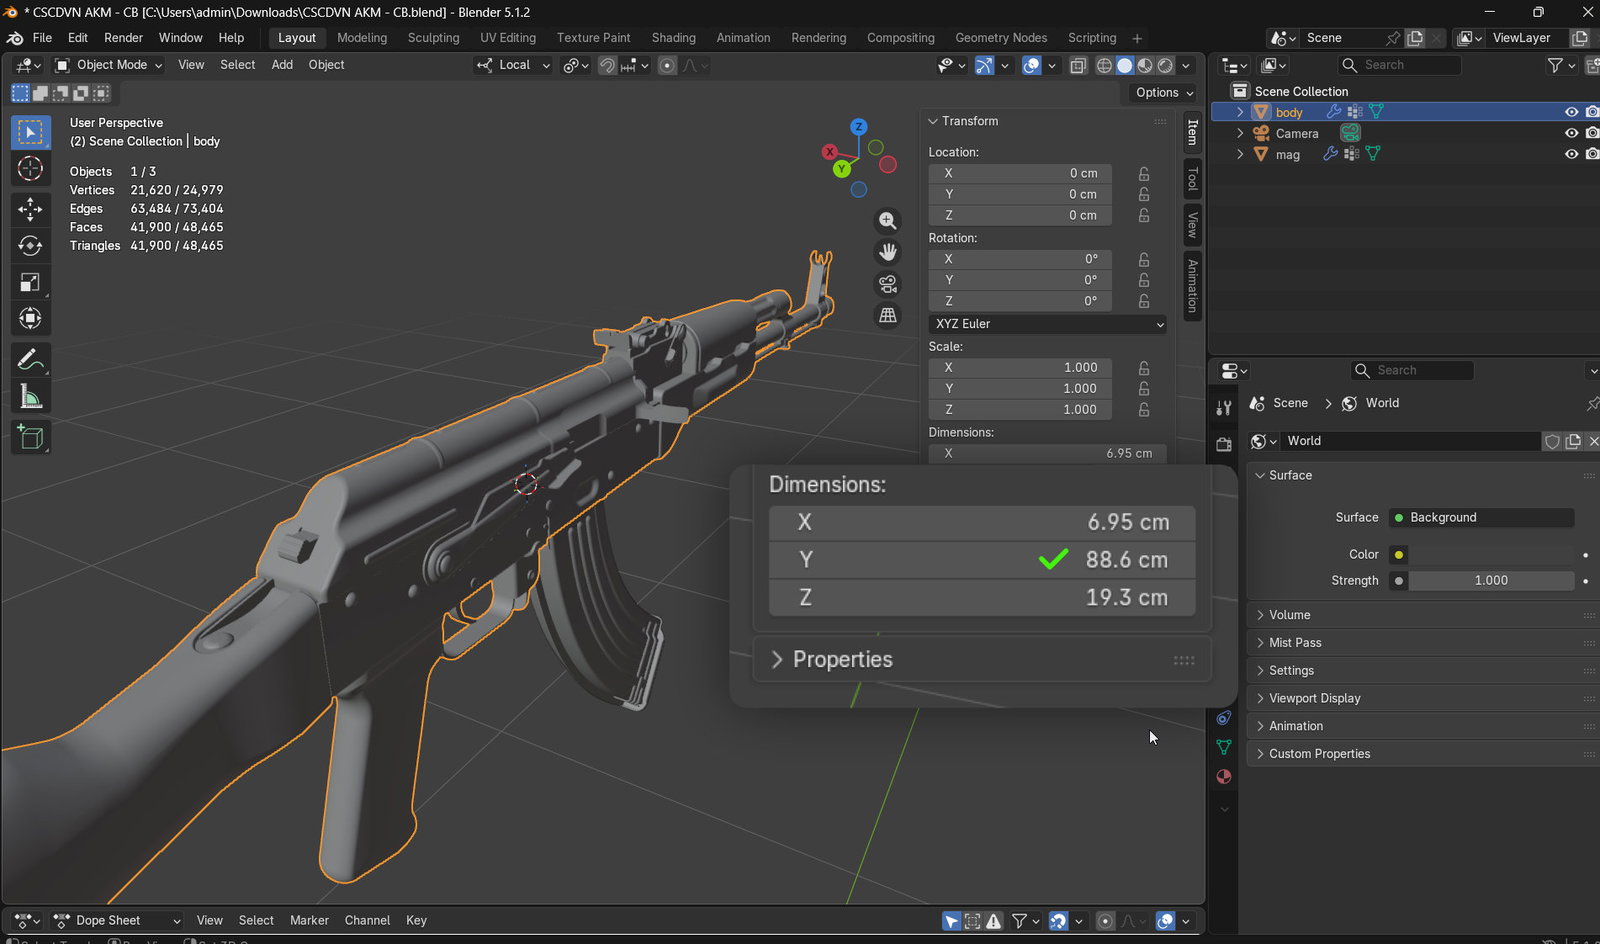
- Set Blender's unit system to metric (1 unit of length equals 1 meter).
- Scale the model to its real-world dimensions. For example, the AKM's overall length including the stock is 880mm, so we scale the whole model to approximately that size (along the Y axis).
- Apply scale.
2.5 Position
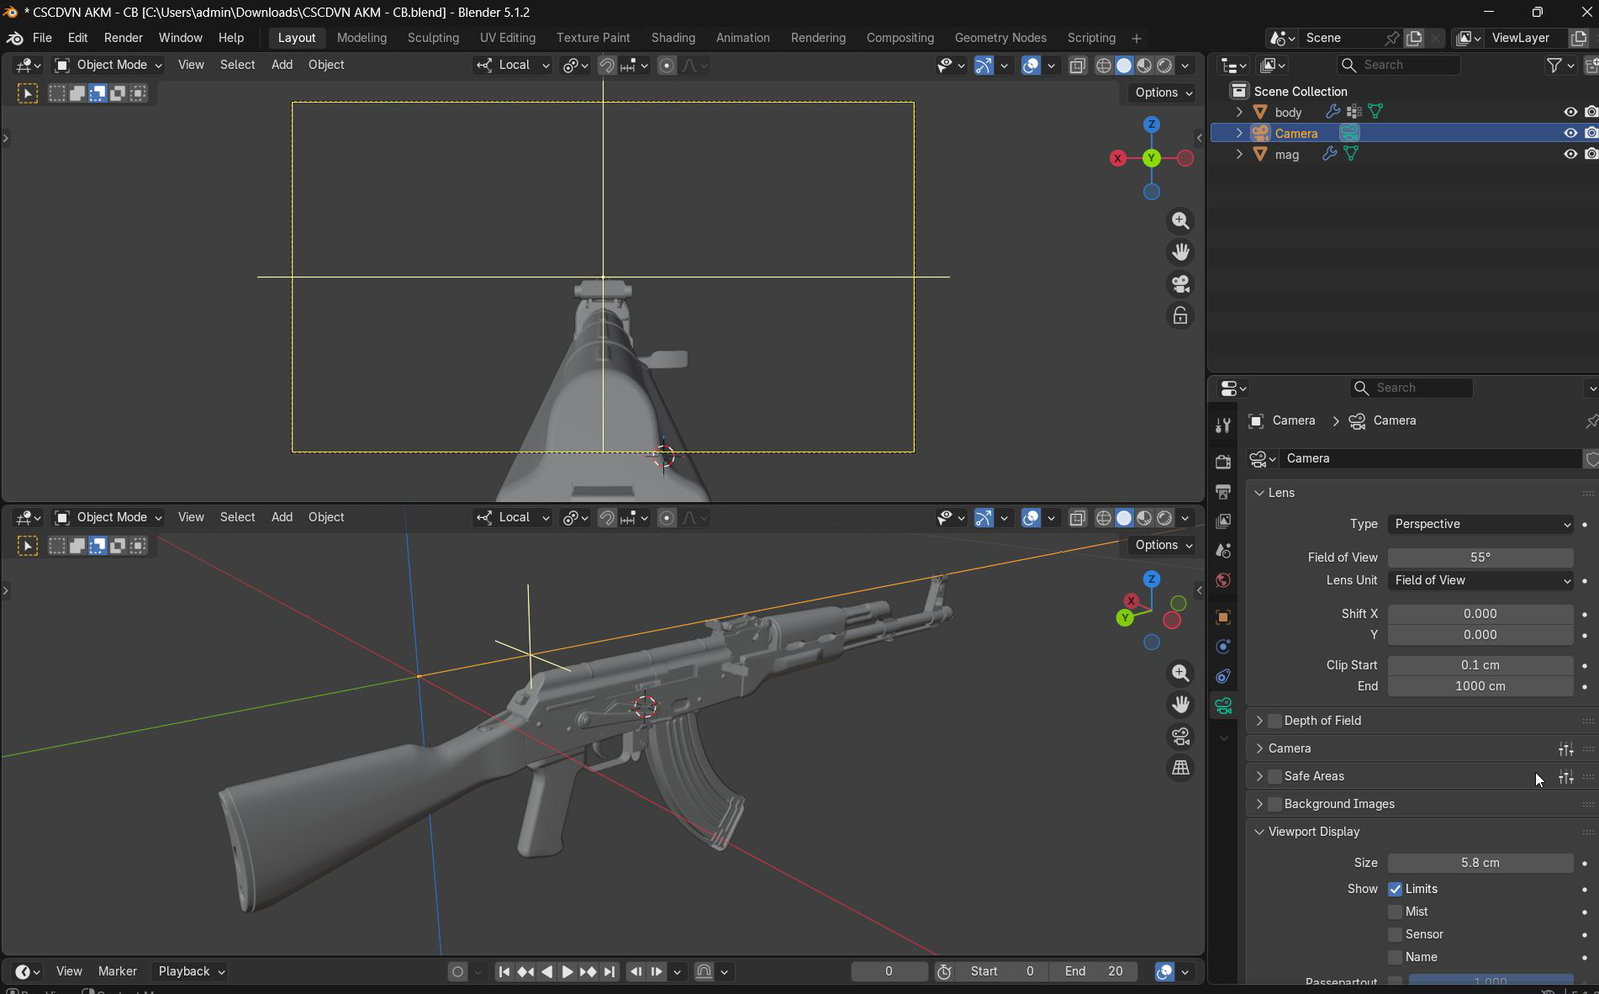
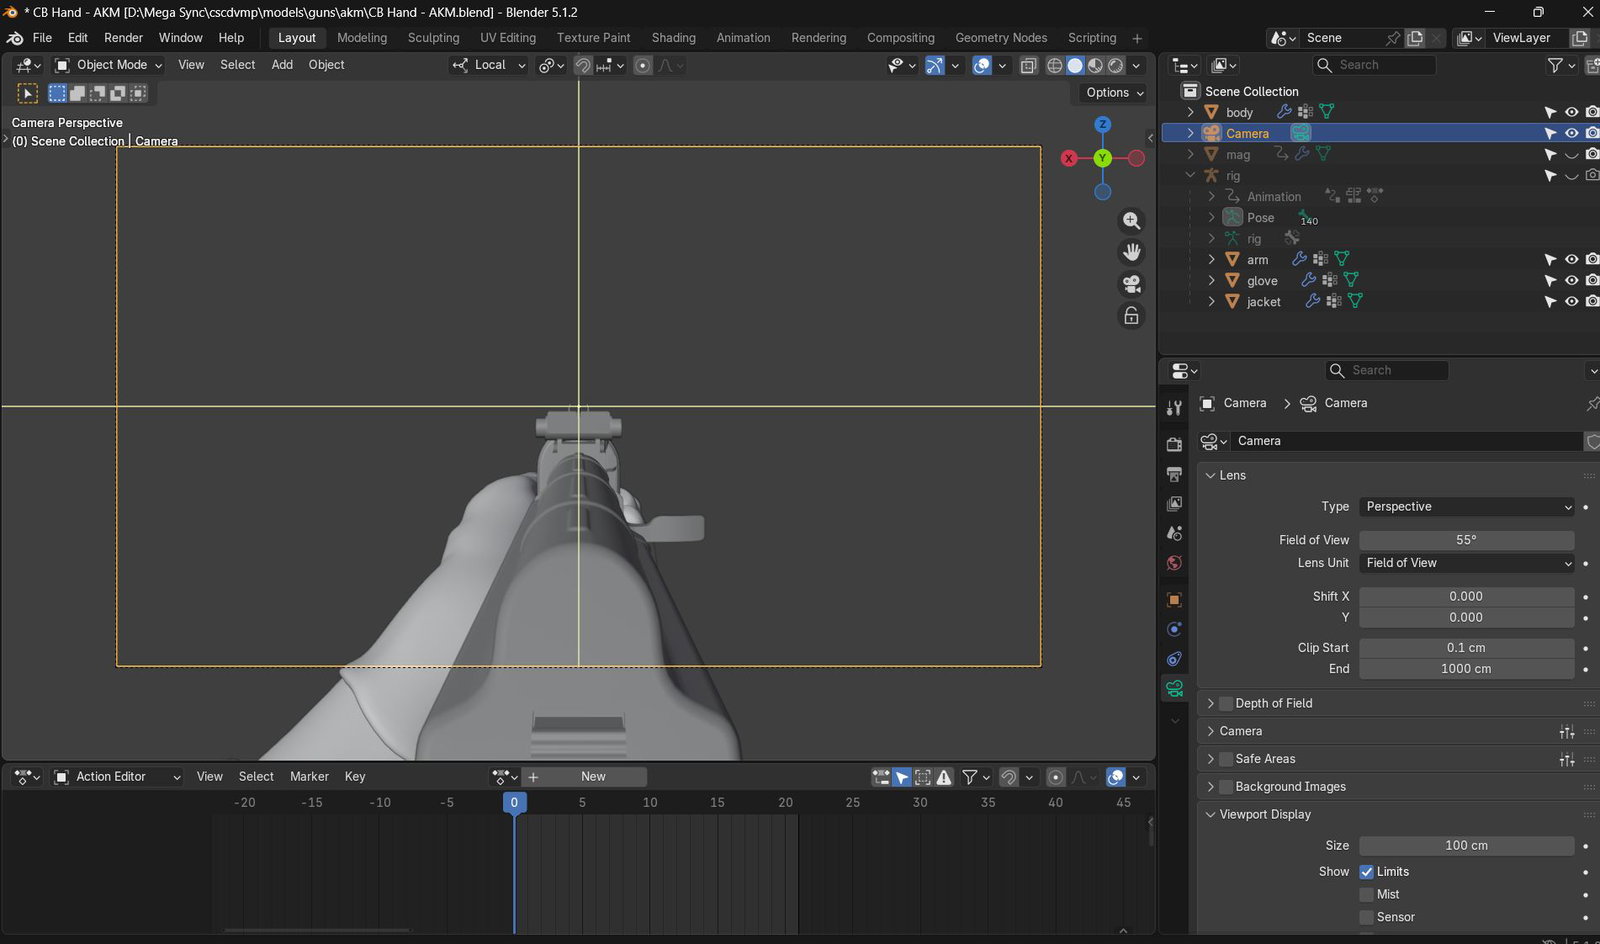
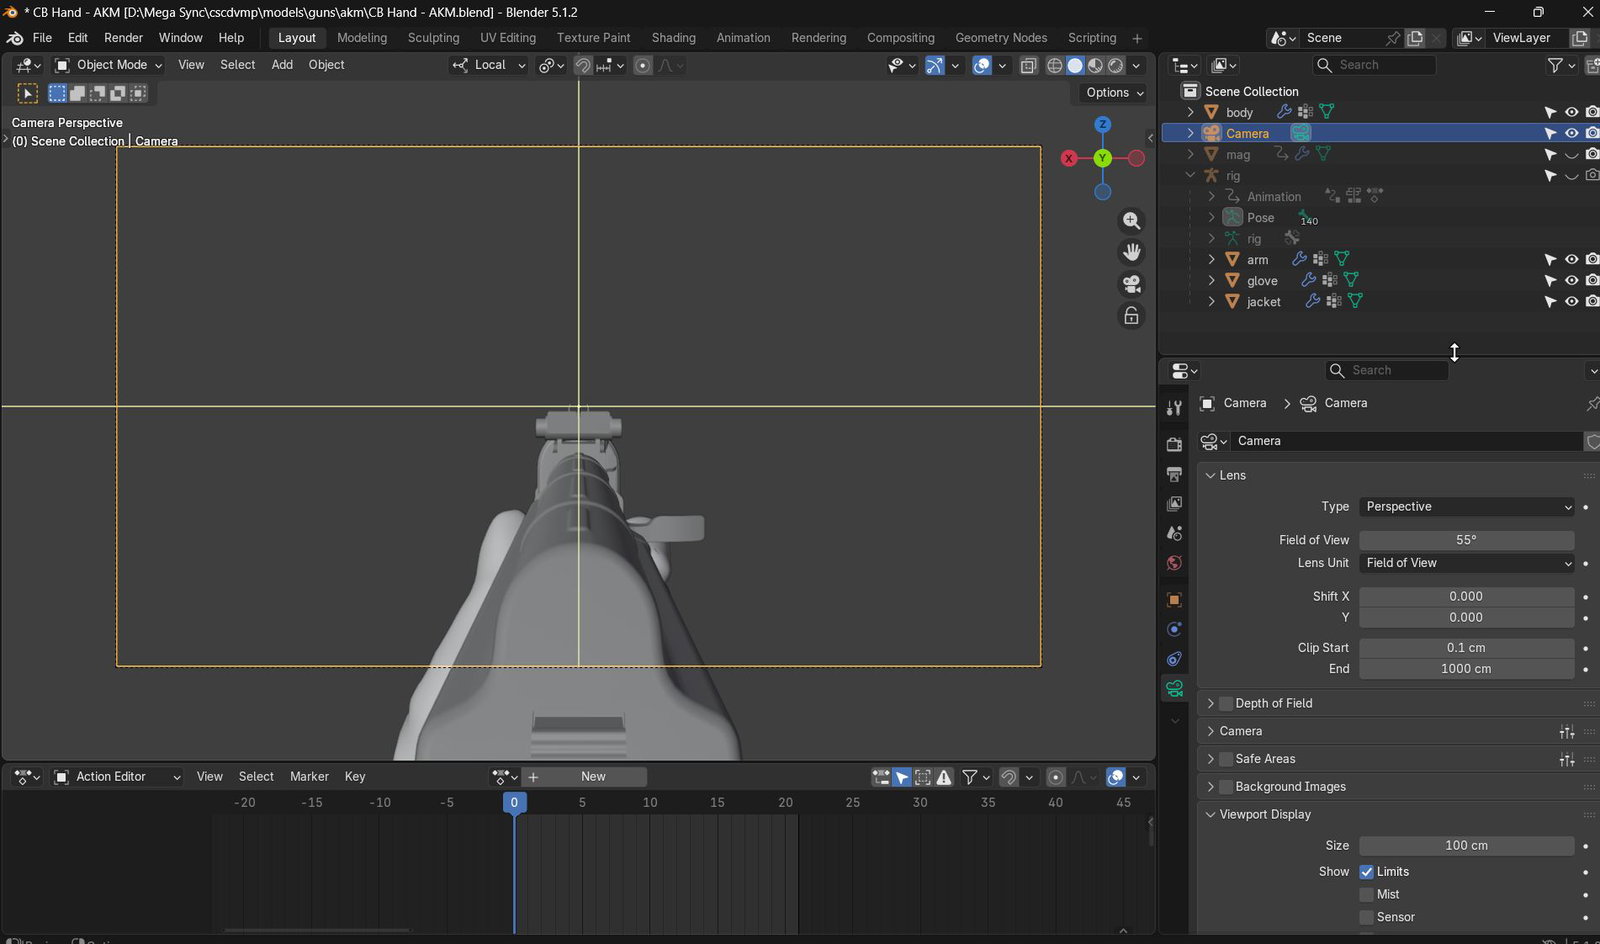
When aiming down the ironsight in-game, the gun model is moved to a position where the camera's forward vector lines up with the line running through the rear sight and front sight.
We'll do the same thing in Blender.
-
Move the camera to the world origin (Alt + G), making sure the camera's forward vector aligns with the Y- axis.
-
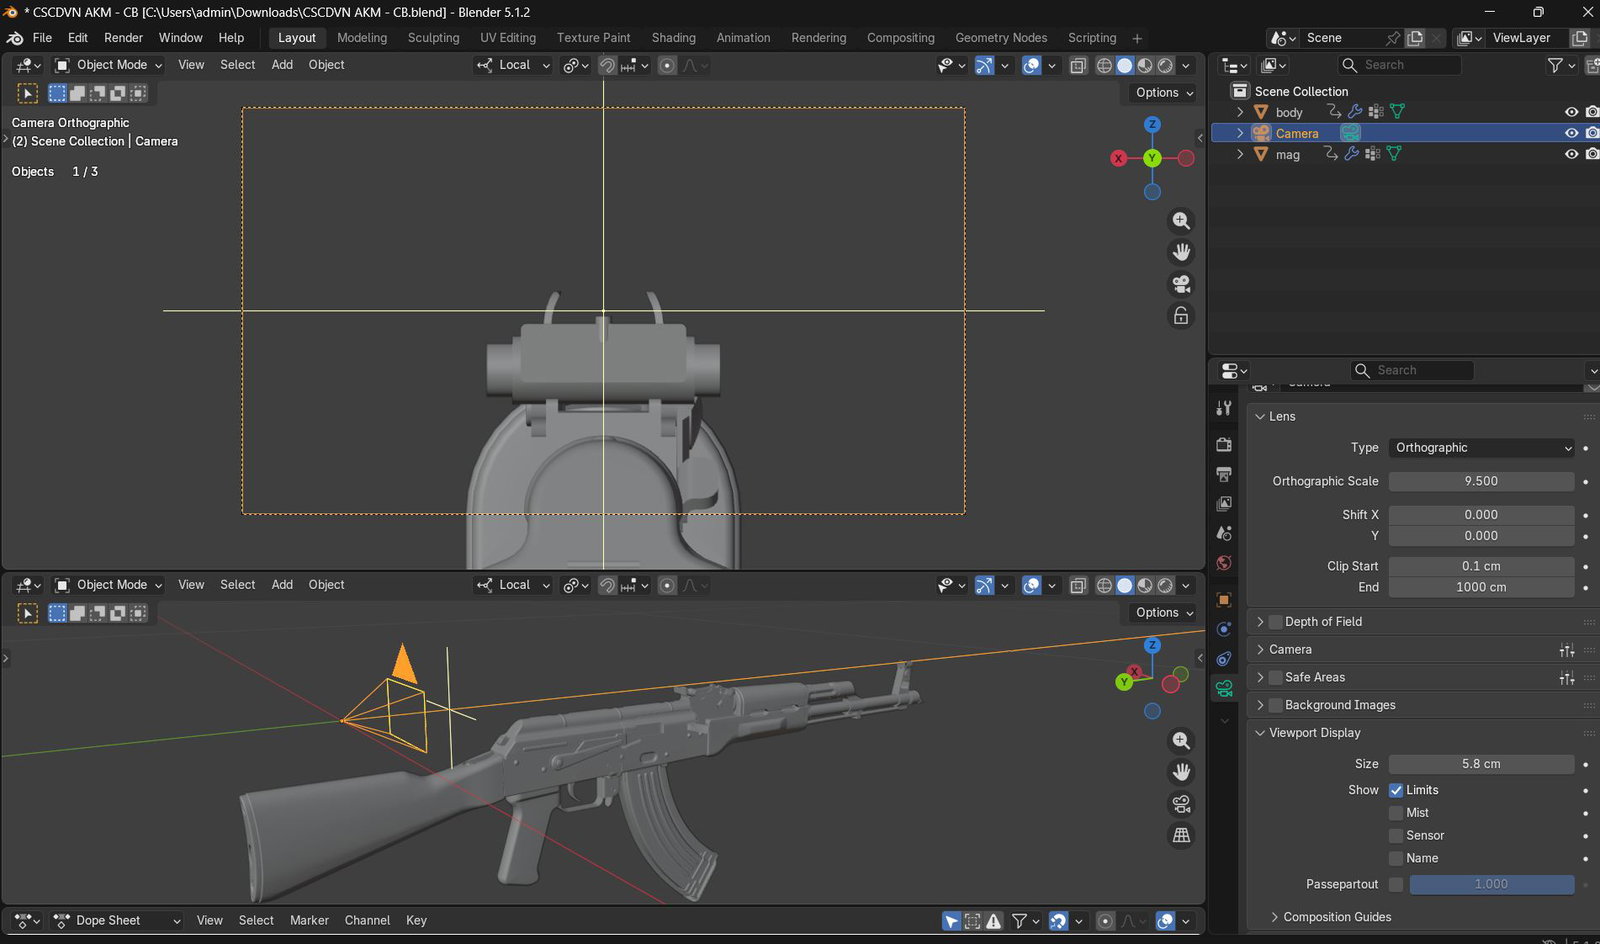
Switch the camera's view mode to Orthographic, and switch the viewport to the camera's view.
-
Move the gun model along the X/Z axes so the rear sight and front sight meet at the world origin (the center of the camera view).
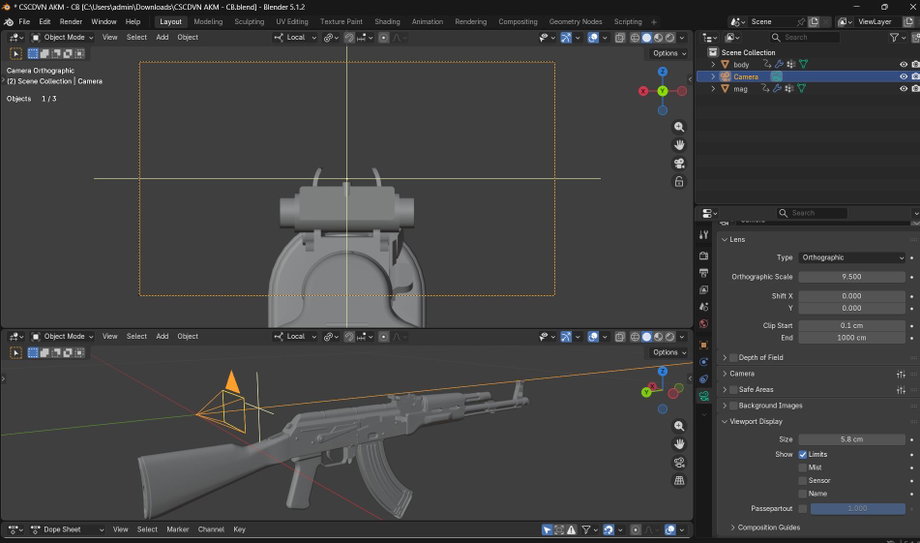
-
Switch the camera's view mode back to Perspective, and set the FOV to 55 degrees (matching the game's default FOV).
-
Move the gun model along the Y axis until you're satisfied — this view should be close to what you'll see in-game.
Note: this view corresponds to the "aiming deep" state in-game, so make sure the weapon's ironsight is clearly visible at a reasonable scale. Don't leave the "body" mesh too far away, since the gun model automatically moves further from the camera when using "quick aim".
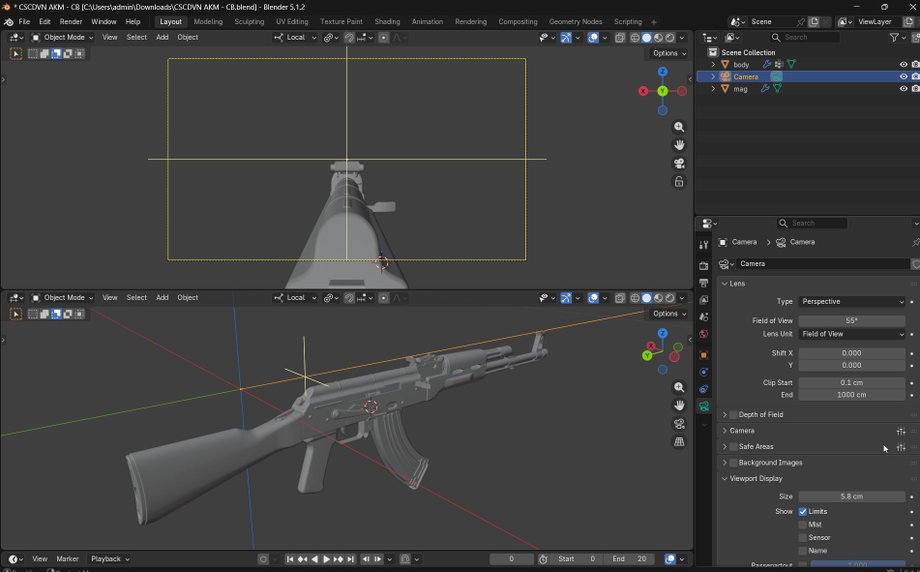
-
Apply position for "body".
-
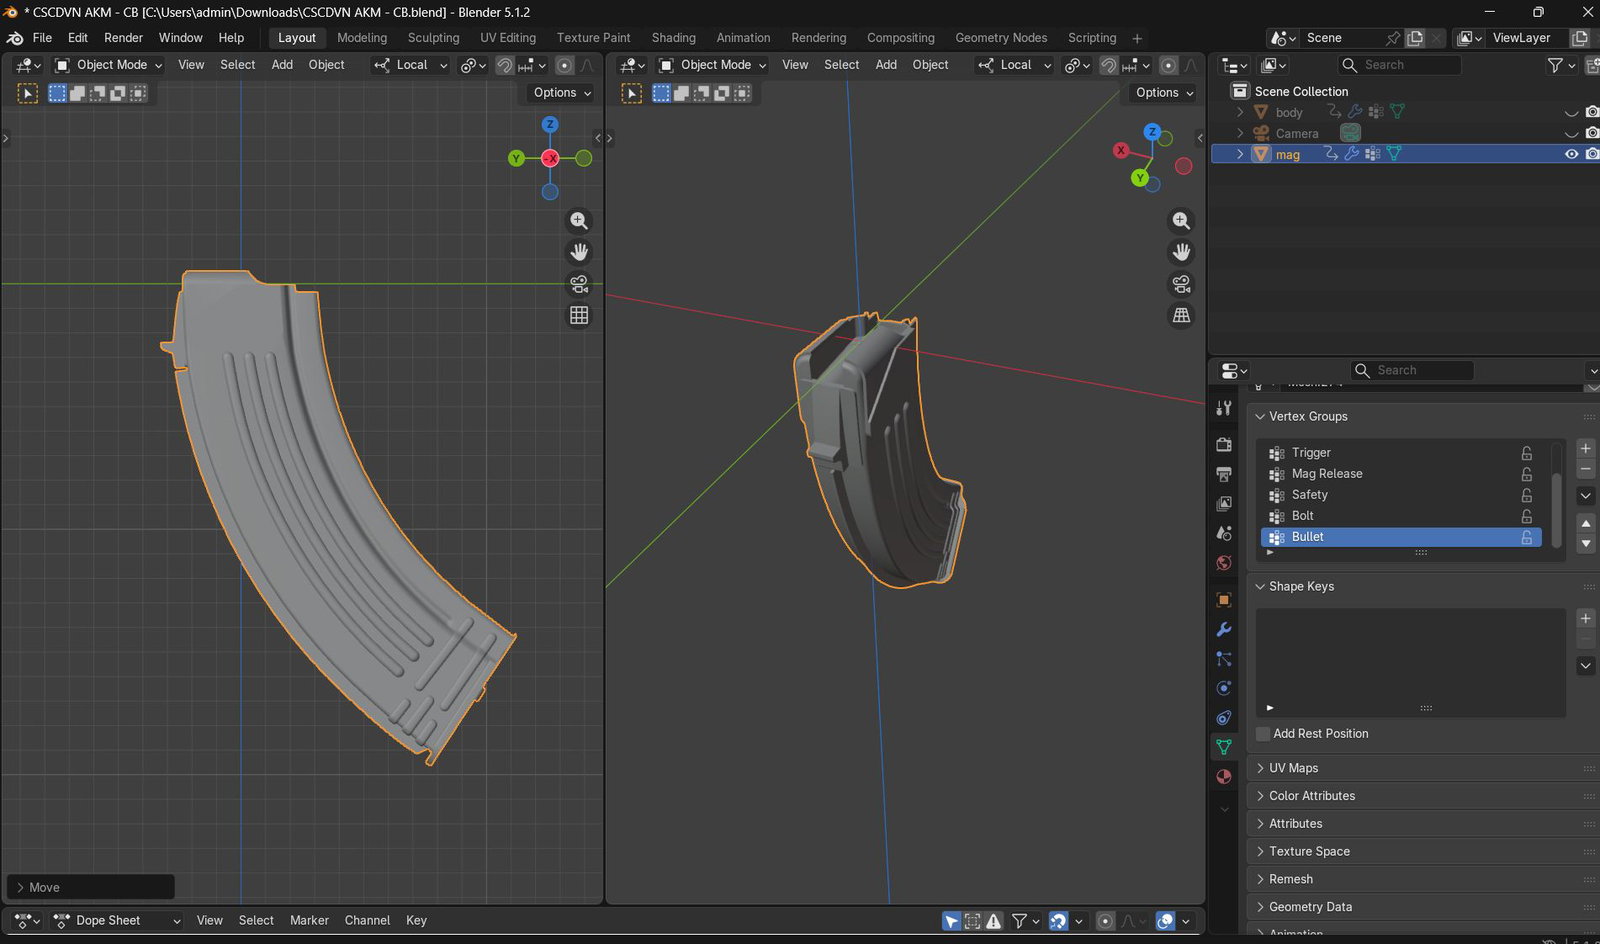
For the "mag" mesh, adjust its position so the world origin sits at the top of the magazine; you can hide "body" and switch to side view to see it more clearly.
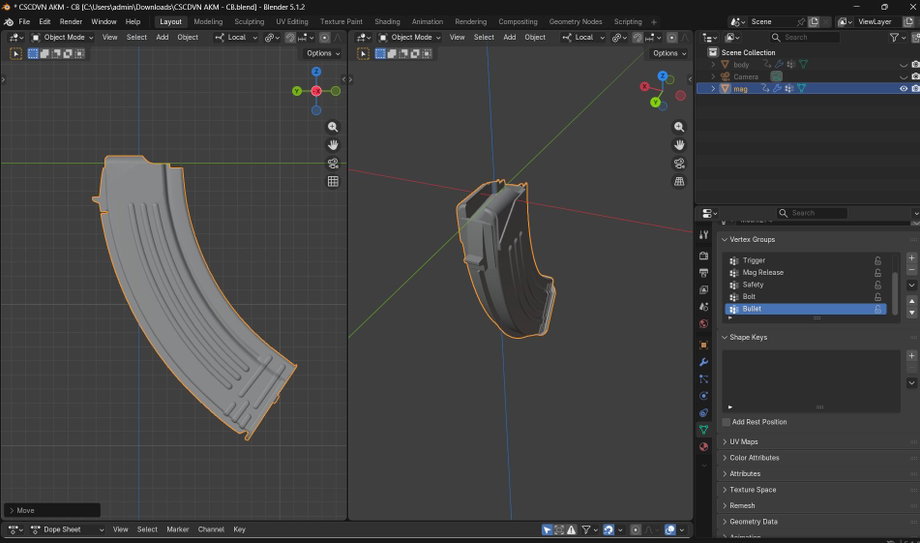
-
Apply position for the "mag" object.
Tip
You can make all the Position, Scale, and Orientation adjustments first and then apply Apply All Transforms afterward — it's faster.
2.6 Animation
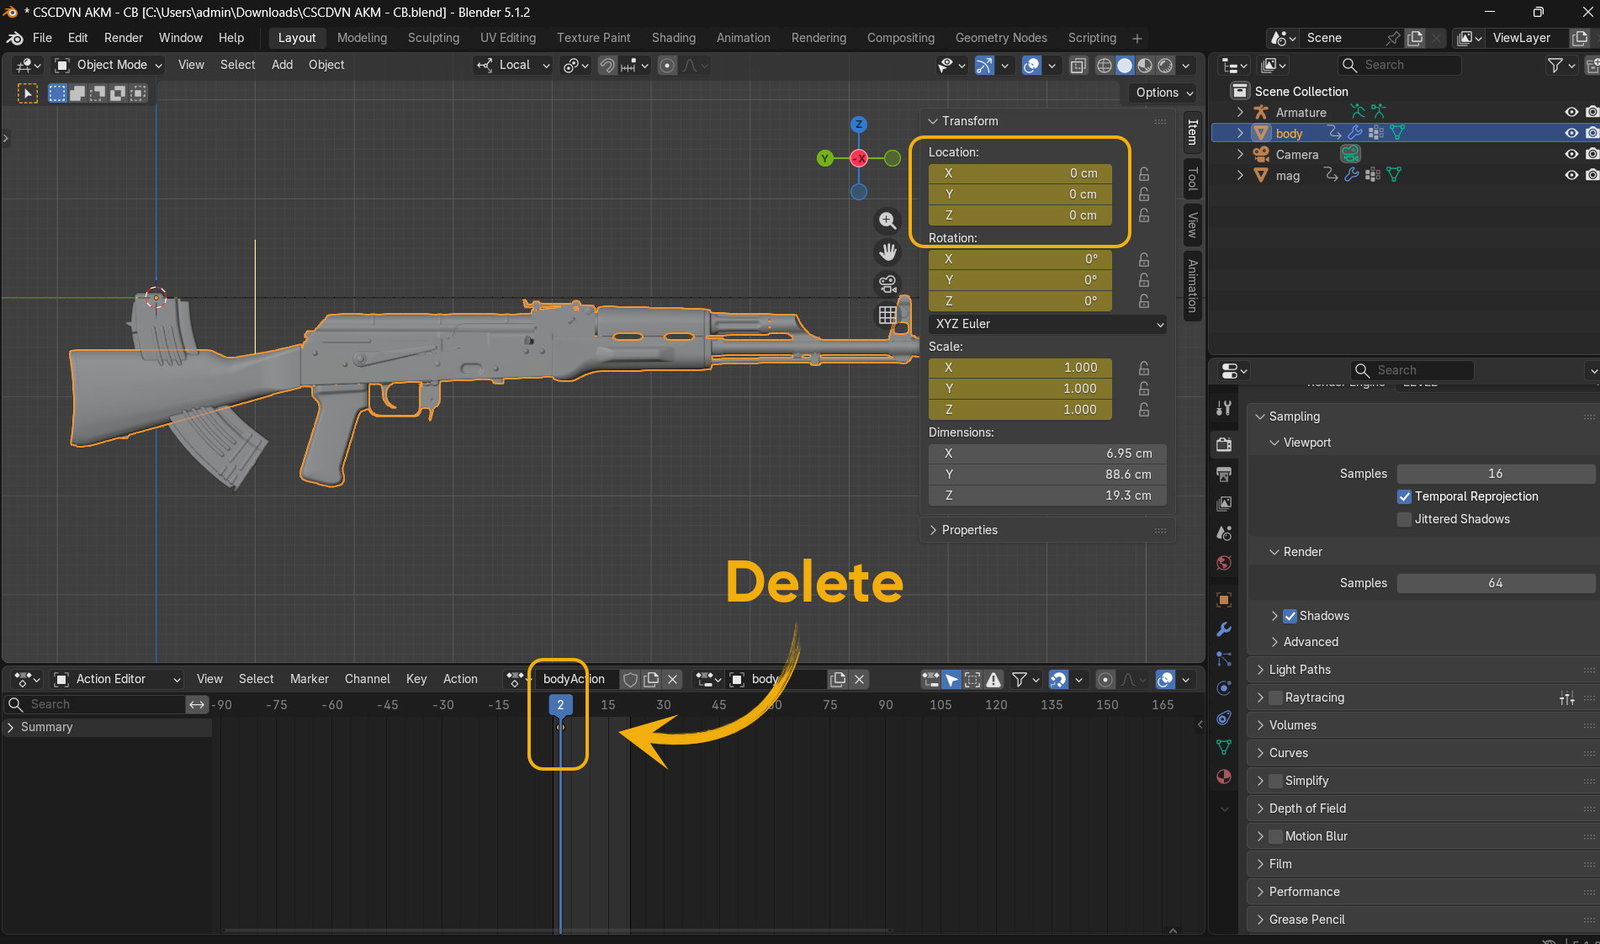
First, check whether any of the model's meshes already have keyframes assigned. If so, delete that mesh's keyframes.
Hide the "mag" mesh, since the section below only applies to the "body" mesh.
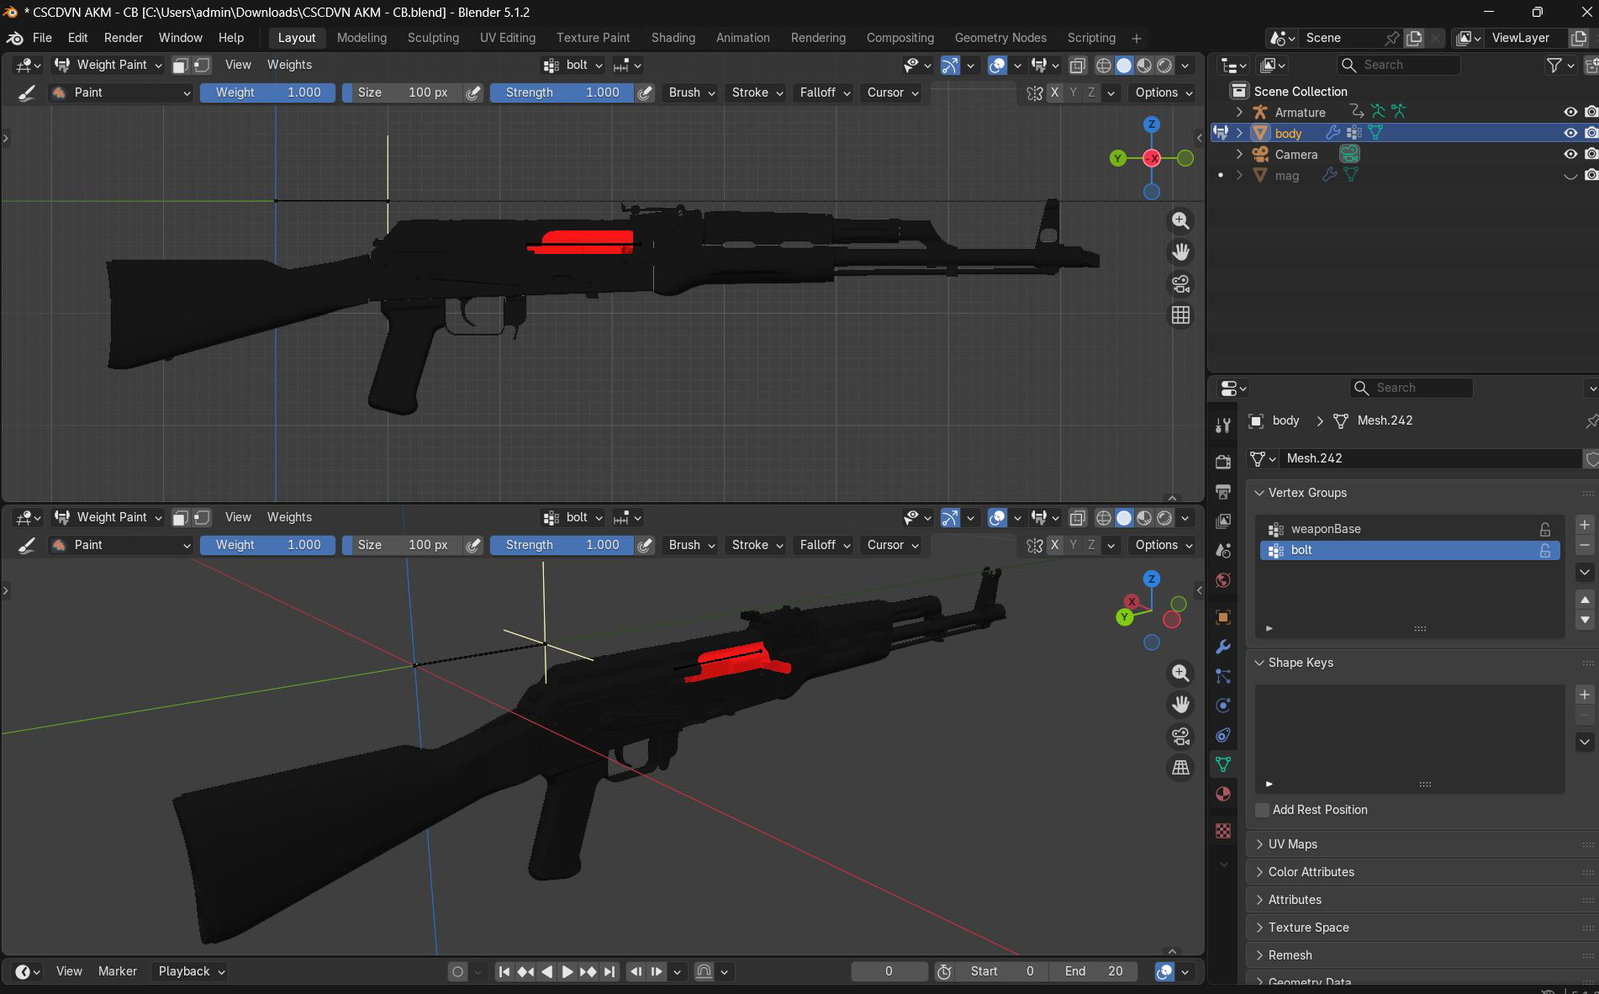
- Create an armature with bones named as shown in the illustration.
- The "bolt" bone should be a child of the "weaponBase" bone, as an Offset.
- The gun's bolt mesh part gets a skin weight of 1.0 on the "bolt" bone and 0.0 on the "weaponBase" bone.
- All other mesh parts get a skin weight of 1.0 on the "weaponBase" bone and 0.0 on the "bolt" bone.
Warning
Note: before animating the bolt mesh, check whether the safety-switch mesh is already set to the "off" position, especially for AK-pattern guns. If not, rotate that mesh part into the correct position — in reality, the bolt can't move while the safety switch is "on".
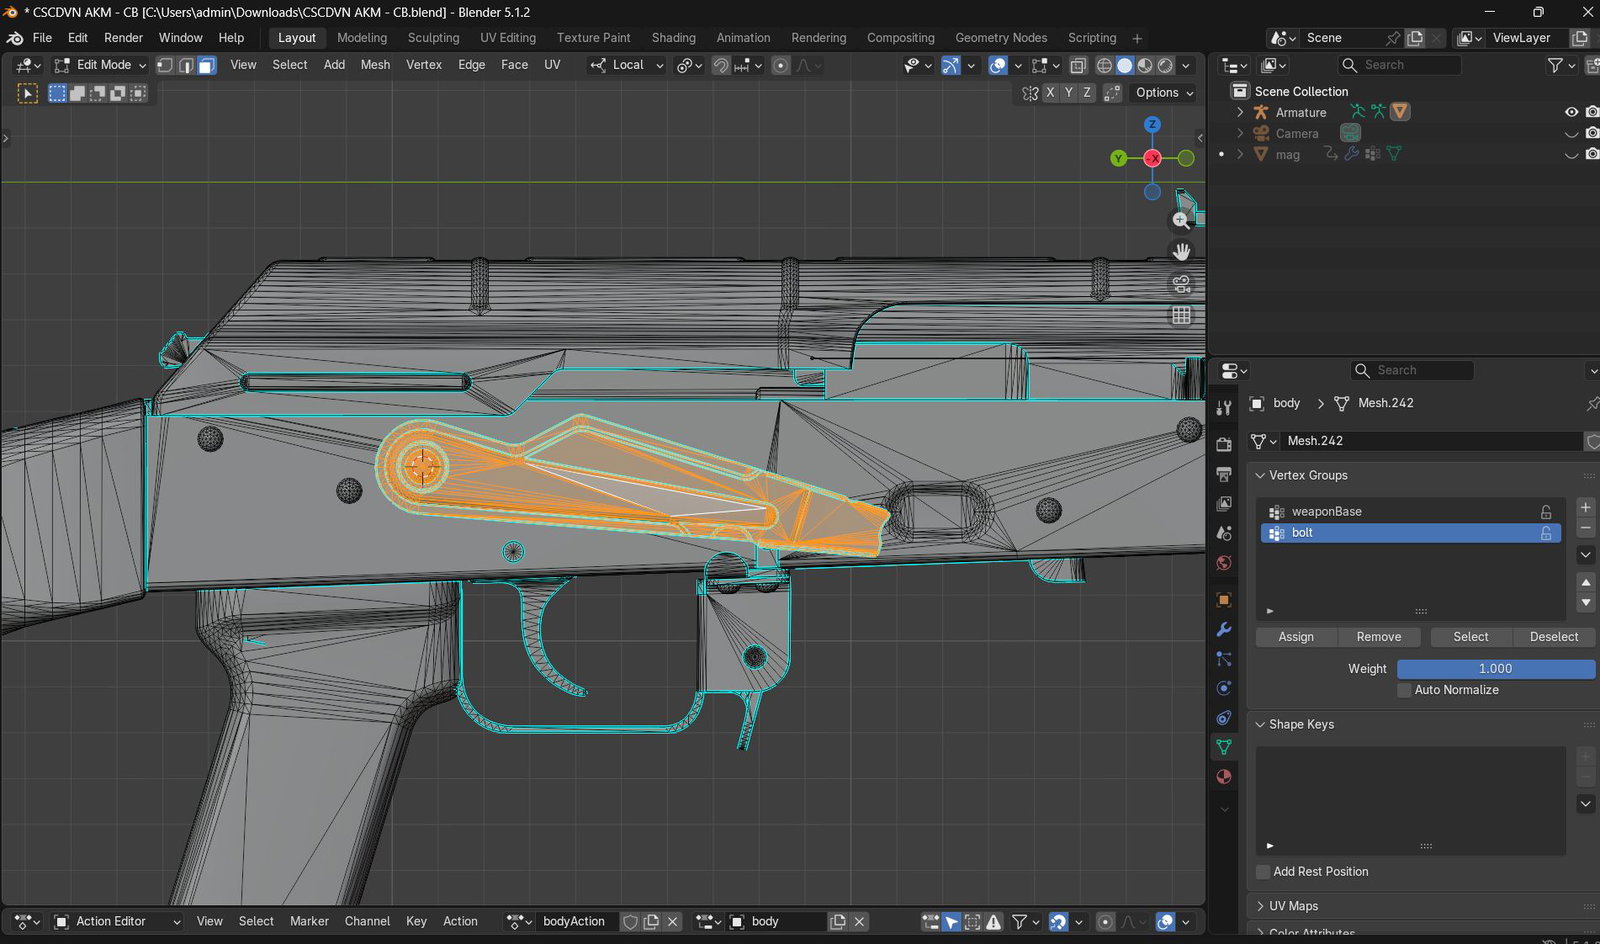
- Create keyframes at 3 points on the timeline: 0, 10, 20.
- At frame 10, move the "bolt" bone to the position representing the bolt mesh's maximum recoil travel.
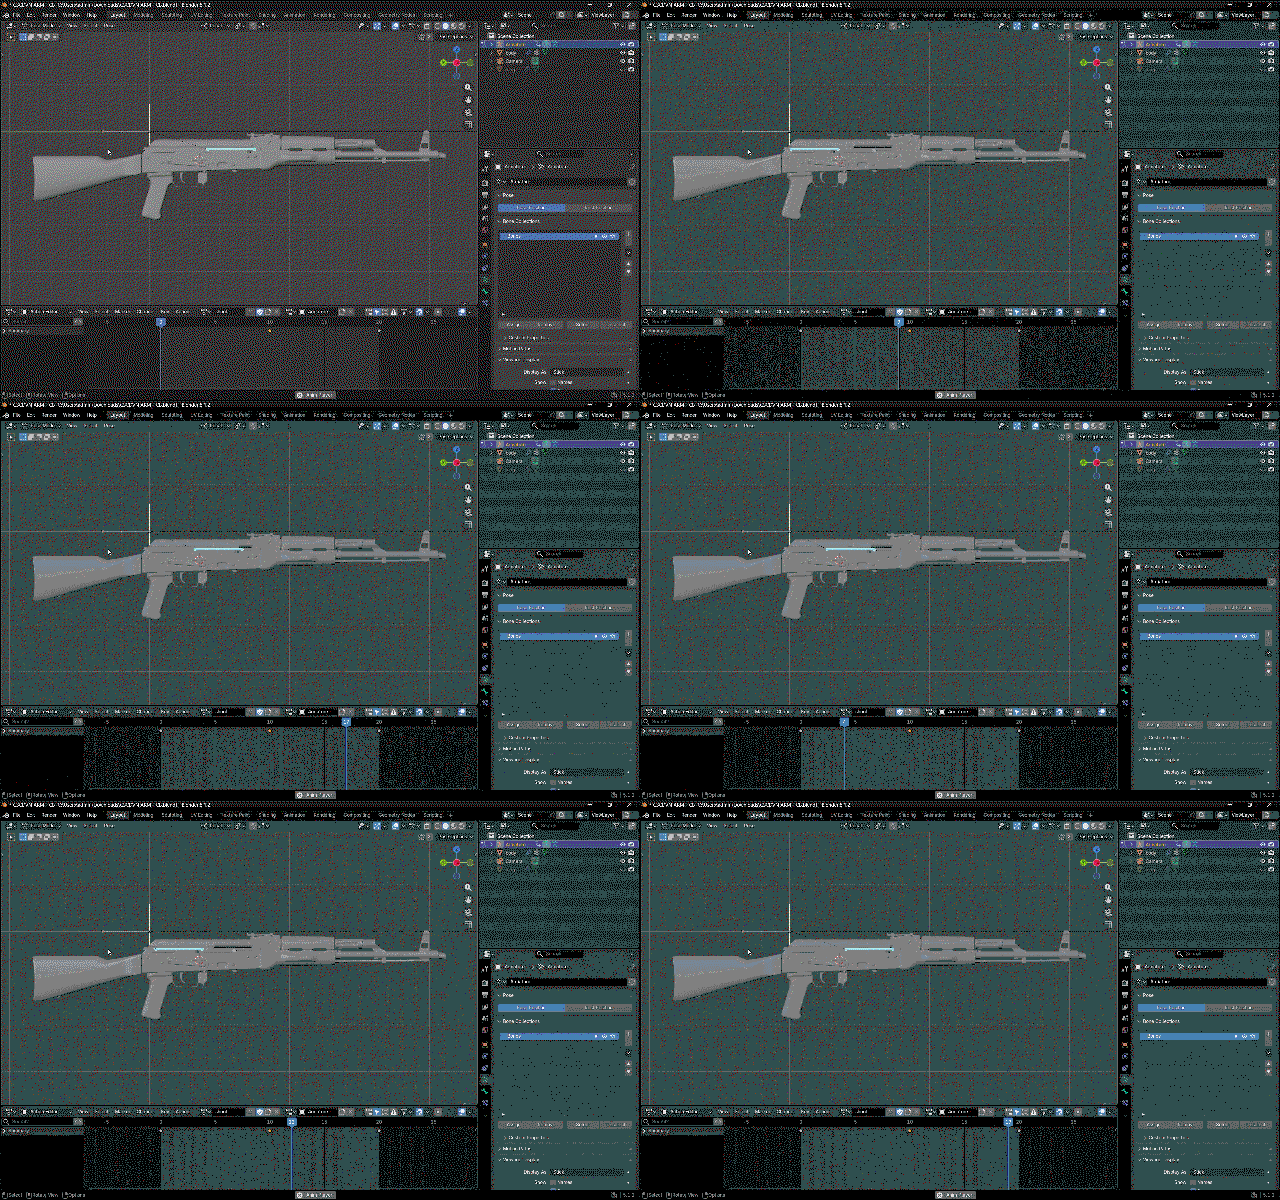
- Name this action "shoot".
- Create another new action named "original" — this action has only 1 frame, at frame 0, with the bolt not yet moved.
Note
Since the AKM has no position representing an empty-magazine "dry" state, you don't need to create an action for it here — but it will be needed for guns that use a "lock-back" mechanism.
At this point, we've finished preparing the gun's model: orientation, scale, position, and animation.
2.7 Material/Texture
The mesh parts of a weapon model may contain many materials, which in turn means a large number of textures. Without optimization, using the CB Gun model in-game will consume more system resources than necessary.
While not required, here are some useful tips for optimizing the model for the game.
2.7.1 Number of materials
For any engine, a model (mesh) is considered optimal when it has just 1 material / 1 texture set, which significantly reduces GPU data-loading time. So if your model can be baked down to a single material for the entire mesh, that's the best outcome!
However, the texture-baking process takes a lot of effort, experience, and time. If you'd rather not "get your hands dirty" with baking, the following solutions still bring meaningful optimizations.
2.7.2 Texture size
Most models coming out of production will come with a 4k or 8k texture set, but for games, texture resolution usually doesn't need to be nearly that high. Here are some tips for determining a texture size appropriate for your game engine.
First, resize textures based on their actual on-screen display area: for example, the AKM's "body" mesh has 3 materials, and the magazine's on-screen area is much smaller than the barrel and body — so the texture resolution for "mag" doesn't need to be as high as the other two.
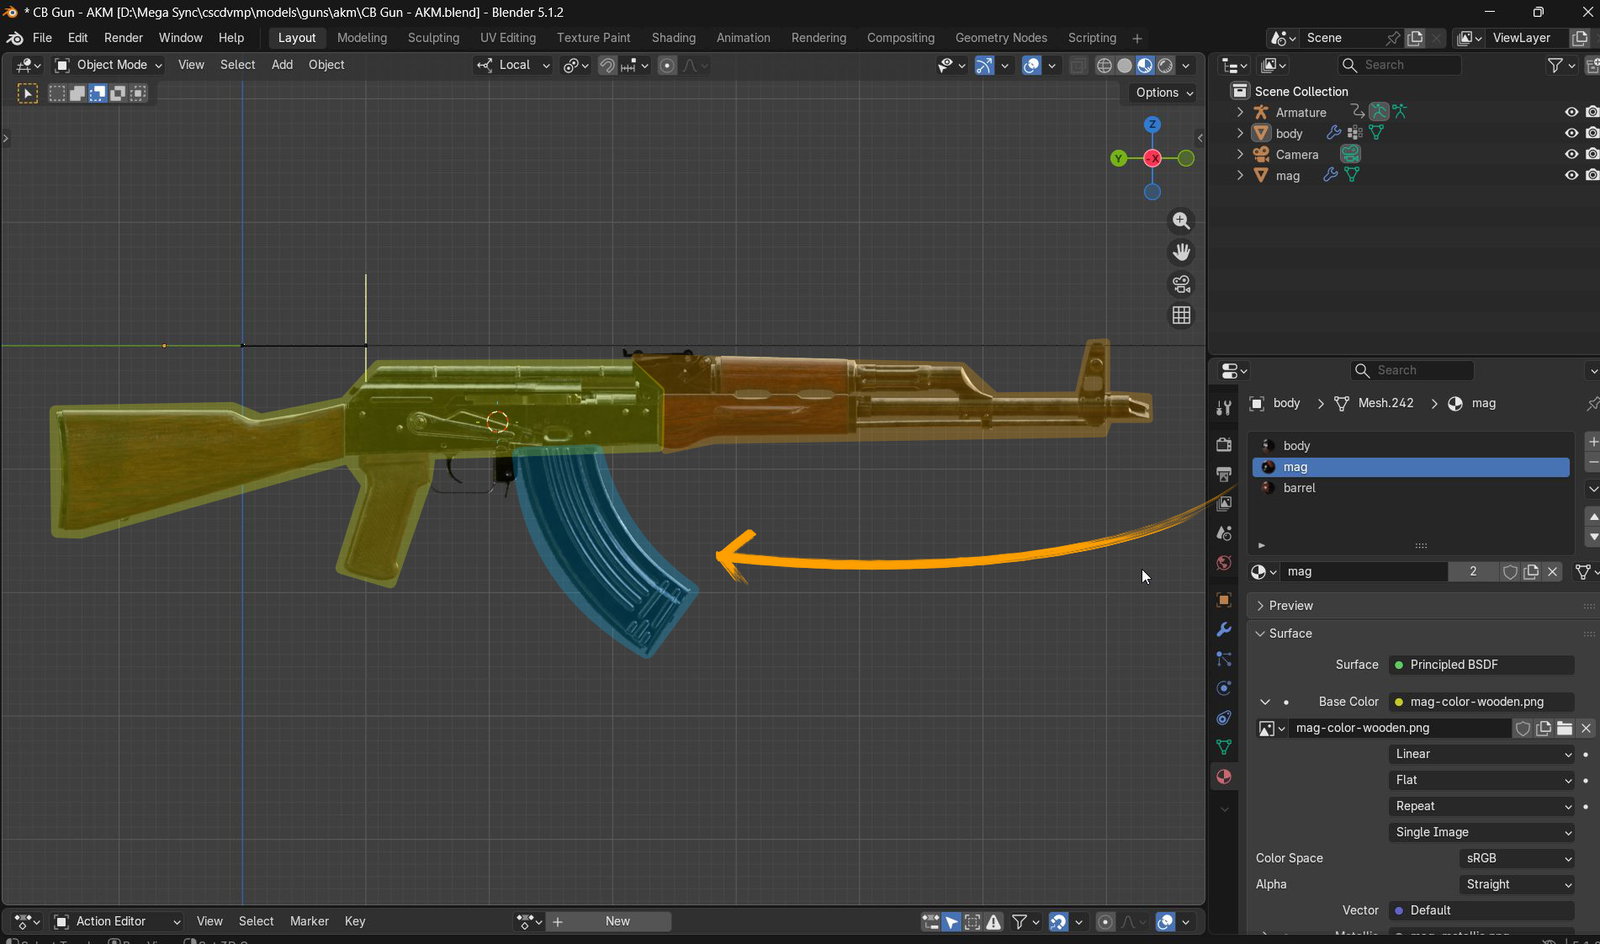
If the model has only a single material, you can comfortably use a 4k texture size, since the total display area for that texture/material is quite large. But as the number of materials increases, reduce the texture resolution for each material as needed while still keeping a reasonable pixel density.
For example, for the AKM model, instead of using 4k for every texture set, we split them as follows:
- "body" material: 2k (2048 × 2048)
- "barrel" material: 2k (2048 × 2048)
- "mag" material: 1k (1024 × 1024)
2.7.3 Normal texture size
For normal maps, while not required, it's recommended to use a smaller size to optimize memory usage and improve GPU processing. Reducing the size does mean lower quality, but in most cases this brings meaningful benefits, especially for small-to-medium-sized models.
Specifically, if the color, metallic, and roughness textures are 2048 × 2048, the normal texture can be as low as 1024 × 1024 and still look fine. In practice, normal-map textures also take up much more storage than the other texture types. Some models even skip normal textures entirely when they aren't really needed.
2.7.4 Naming materials/textures
For consistency and convenience, the author suggests a few naming conventions for materials and textures (not required):
- Material names use lowercase letters, separated by hyphens (-), kept short, and should match the name of the mesh object they belong to. For example: "body", "barrel", "mag".
- Texture names follow the same naming style as materials, with suffixes such as -color-[style], -normal, -roughness, -metallic. For example: "body-color-red", "body-normal", "body-roughness", "body-metallic".
Note
This naming convention brings a few benefits:
- Using (-) to separate words instead of a space avoids accidental double-spaces during naming, which can lead to unnecessary typos that cause bugs. It also avoids underscores (_), since double-clicking to select a word for renaming usually selects the whole underscore-joined string instead of a single word.
- Using lowercase distinguishes these names from Enum variables in code, which are typically written in ALLCAPS.
3. Preparing the hand model (CB Hand)
CB Hand is an object already included in the game's package, and its job is to display the appropriate poses for the CB Gun it's paired with.
For example, for gun A, the normal pose (left hand gripping the hand guard) will differ from the normal pose for gun B, because the two guns' hand-guard meshes are different — so the fingers need repositioning to properly show a "firm grip" on each gun's mesh.
So for every CB Gun brought into the game, you'll need to adjust the corresponding pose for CB Hand.
Tip
If gun A's pose isn't too different from gun B's pose, both guns can share the same pose set, saving you from adjusting poses for both guns!
3.1 Copy CB Gun
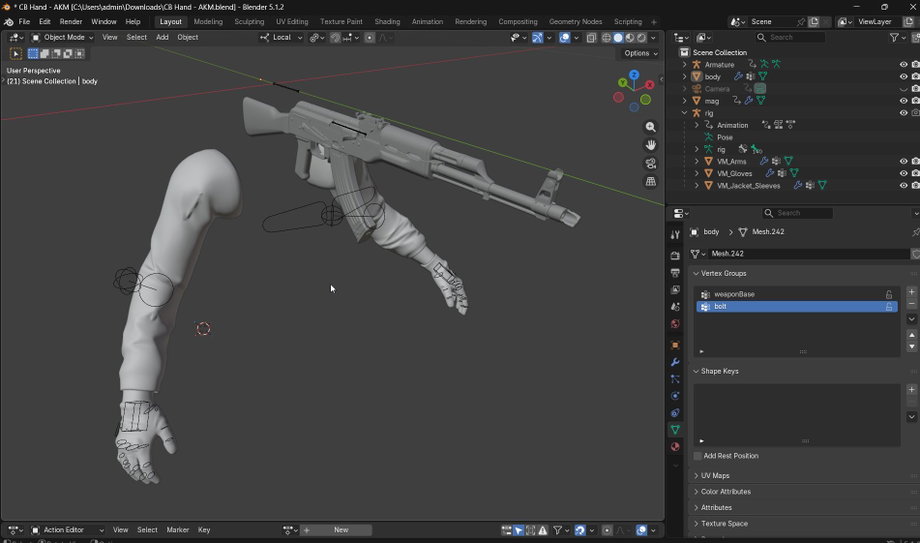
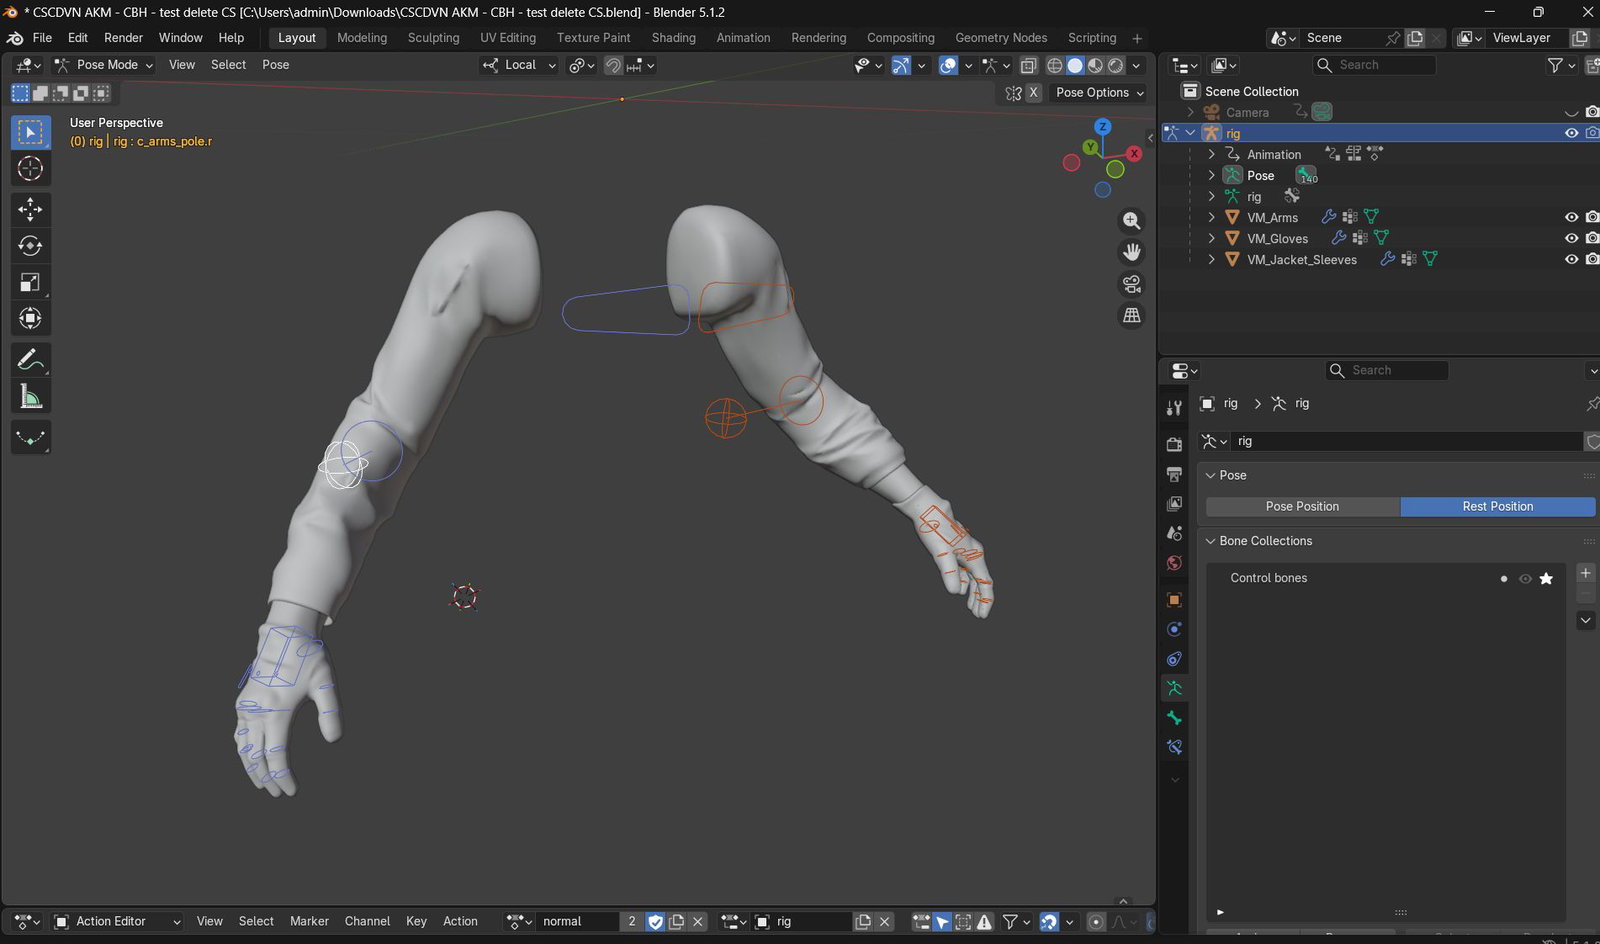
For convenience, the development team provides a blend file for CB Hand that already has the control bones set up — you just need to adjust the pose:
-
Download the CBHand.blend file.
-
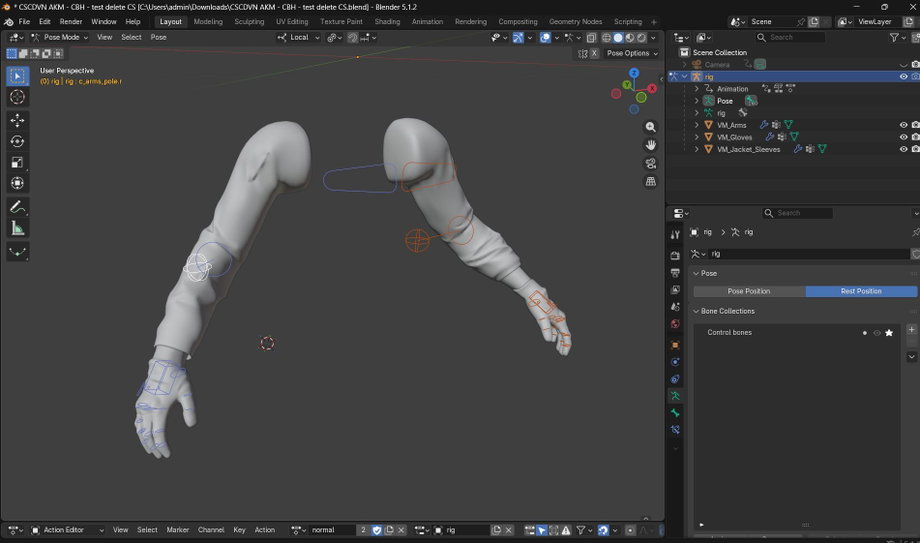
In the file, you'll see the CB Hand model already positioned at the world origin.
Note: both CB Hand and CB Gun need their origin point at the world origin in order to work correctly in-game, in Blender, and in GDE. So it's recommended not to change CB Hand's position.
-
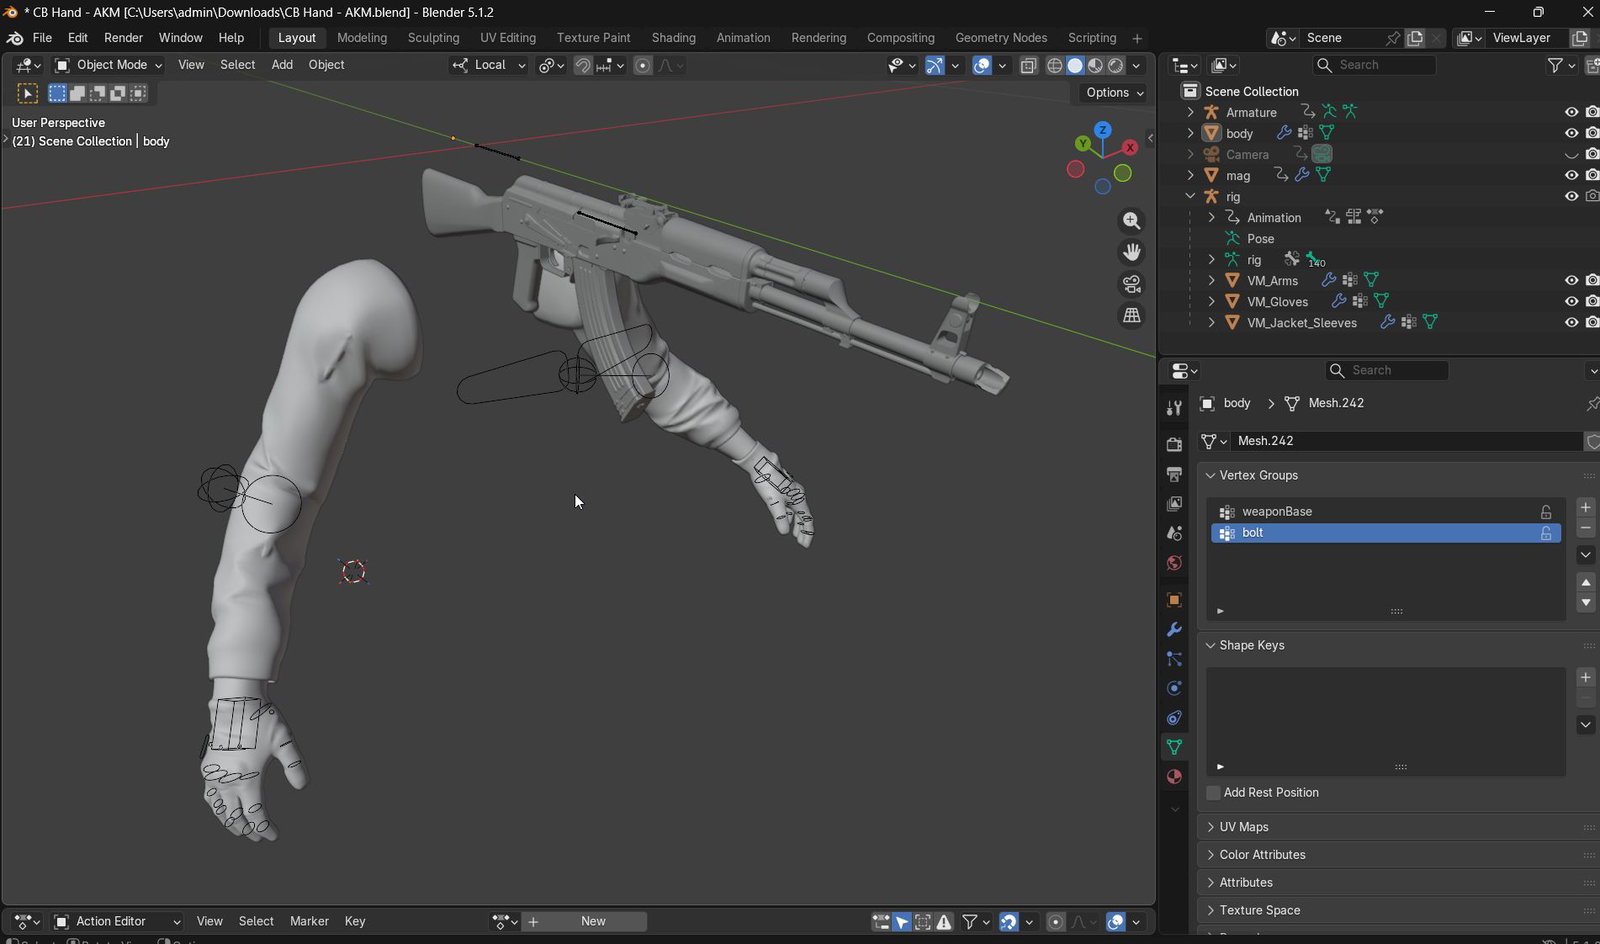
Open the CB Gun (AKM) .blend file you prepared in the Preparing the gun model step, and copy the "body" and "mag" meshes over into the CB Hand file. The CB Gun here is only for reference, to help adjust CB Hand's pose accurately.
Note: you may need to reposition the magazine back to its original position attached to the gun body, since we previously moved it to the world origin to Apply position.
3.2 Adjusting the pose
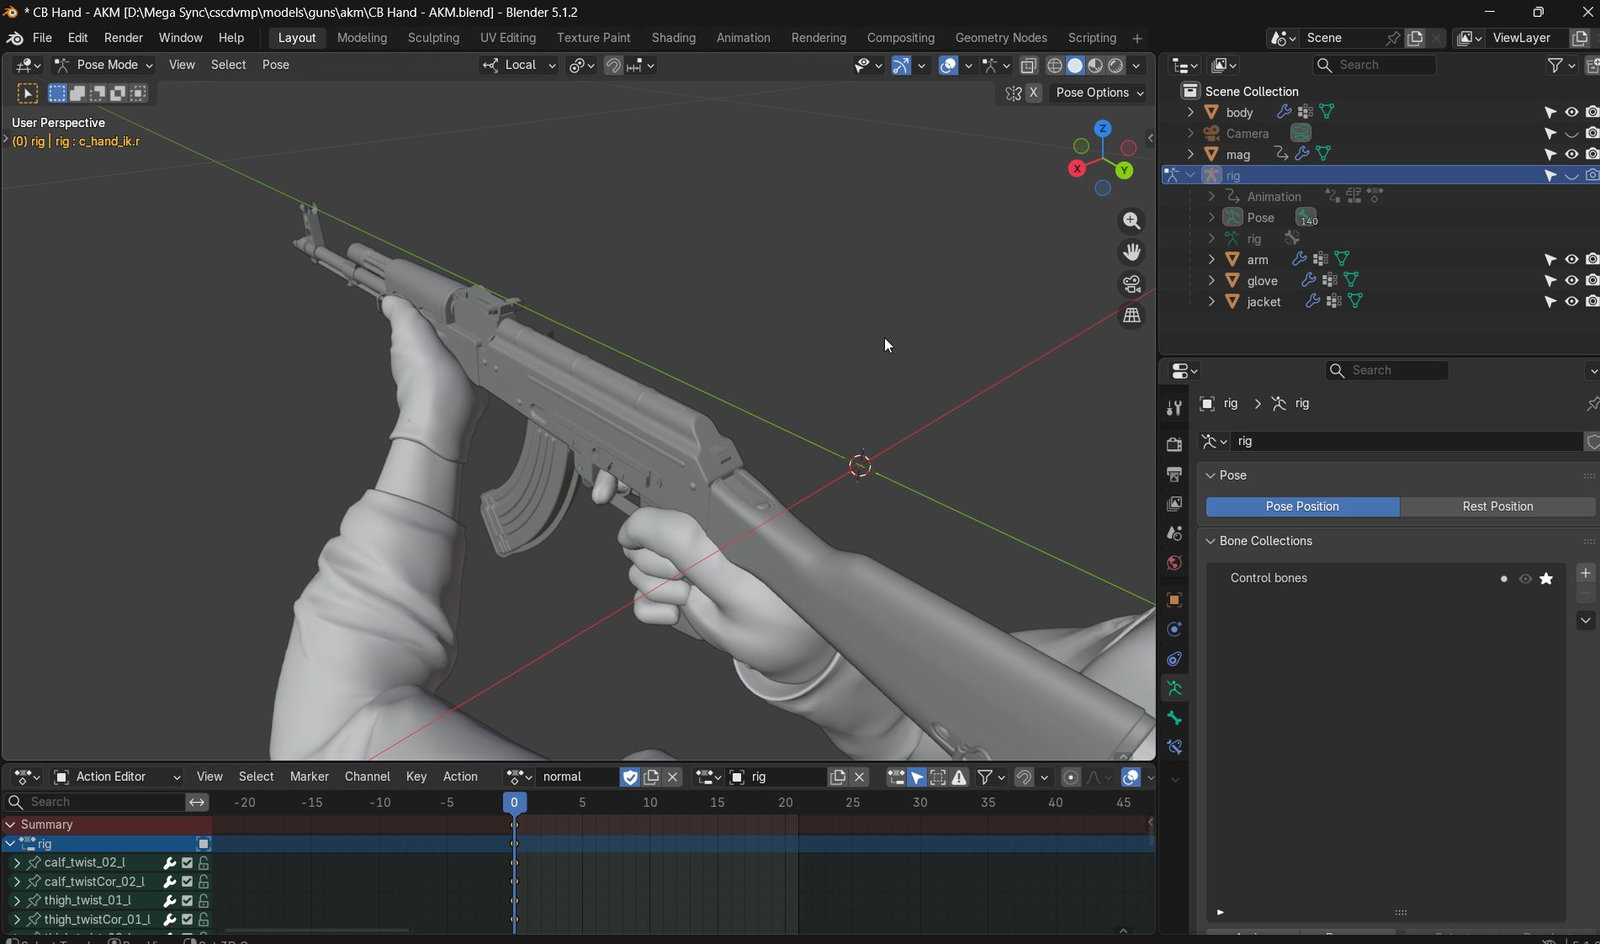
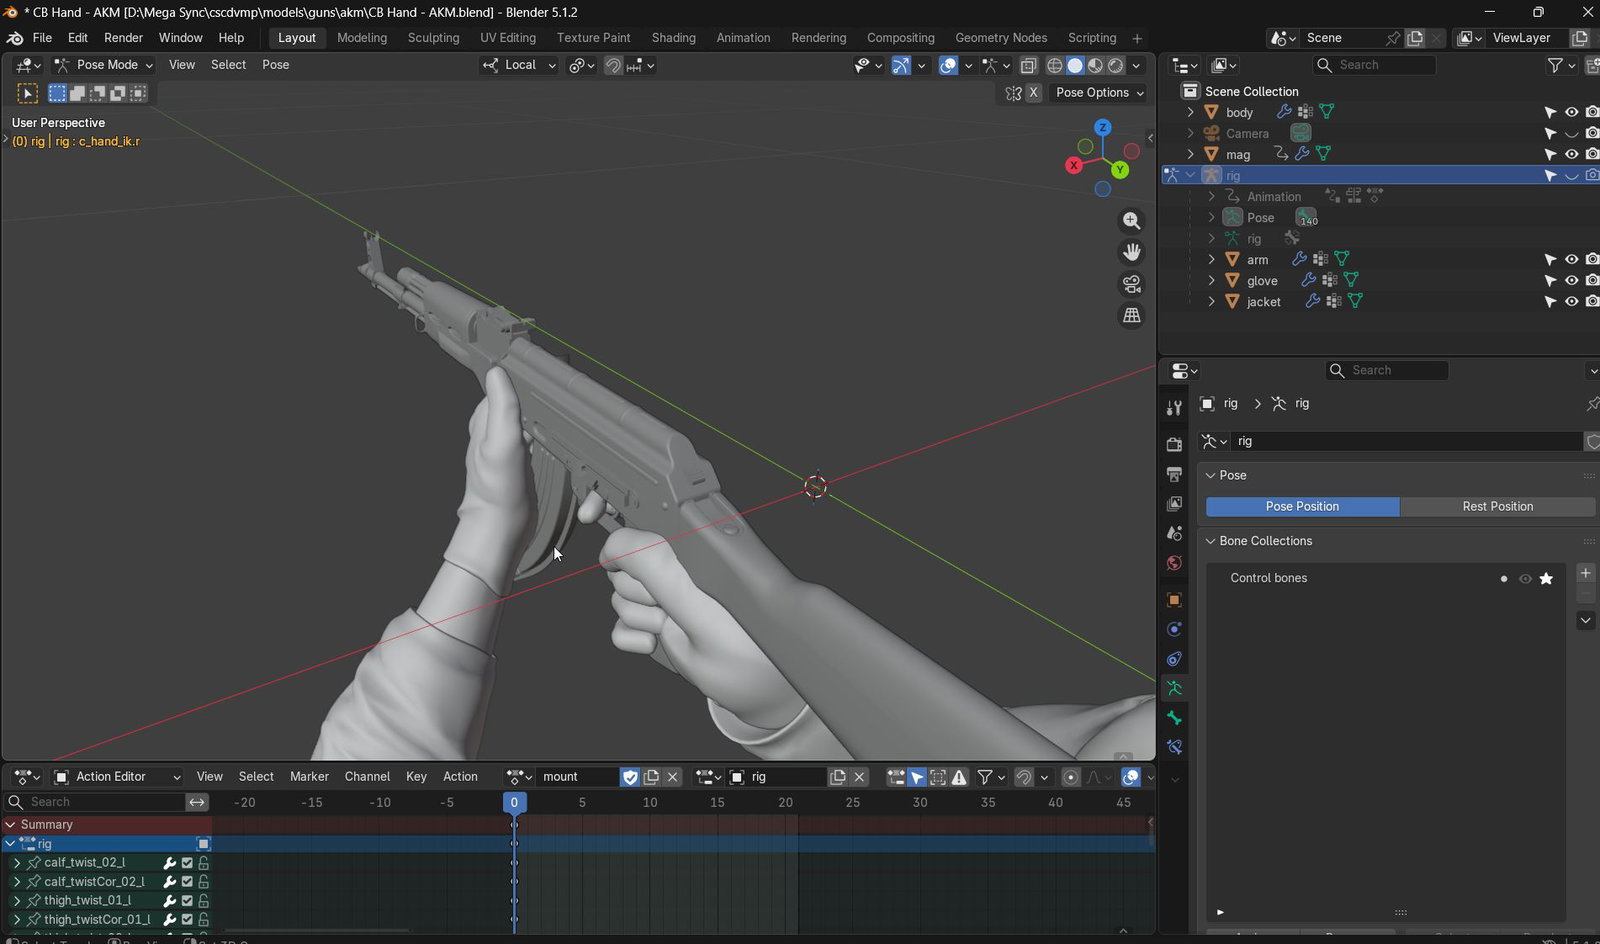
- Select the armature for the CB Hand mesh, and in the Properties panel, switch from Rest Position to Pose Position.
-
Adjust the control bones to achieve the normal and mount poses for CB Hand (as shown in the illustrations below).
Note: the file already includes 2 actions named "normal" and "mount" for the CB Hand armature mesh — you can adjust the pose starting from these two actions, or create a new action if you prefer.
Tip
At this point, you've finished preparing both the CB Hand and CB Gun models.